The Loreo 3d attachment.
Review by Donald E. Simanek.
 |
The stereo pictures below are presented for cross-eye free viewing. You should have a display screen at least 1000 pixels wide. The cross-eyed viewing method takes some people a while to learn, but is worth the effort, for stereo pairs may be presented on the page (or screen) much larger than with other free-viewing methods. To learn how to do this, see How to View 3d. At first, it helps to move your head farther from the screen until you can reliably fuse the two pictures, then move closer, slowly.
Always interested in stereo 3d photography, I bought one of the Loreo 3d "lens in a cap" (LIAC) attachments for my Pentax Digital SLR. No one yet is selling a digital stereo camera, so this might be the next best thing, I thought. [This was before Fuji released their W-1 and W-3 digital stereo cameras.] "Turn your digital SLR into a 3d camera" the ads said. Wow! For only $110. But, being a skeptic, I bought it from a vendor that offered a 30 day satisfaction guarantee.
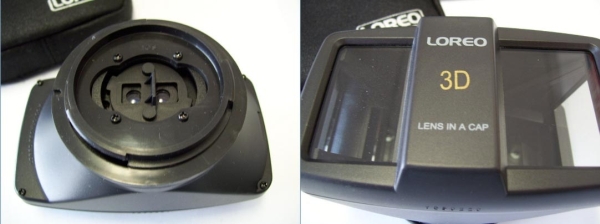
The device is a neat little masterpiece of plastic engineering. Plastic housing, plastic lenses, and maybe even plastic front surface mirrors inside. I haven't opened it—yet. The only metal is the few screws that hold it together. It may be ordered with bayonet mounts (also plastic) to fit major brands of cameras. These are not interchangable, so you must order a Loreo specifically to fit your camera. It is very lightweight, so it won't burden your camera bag.
 |
| Photos courtesy of Alexander Lentjes. The 3d Revolution |
|---|
The front apertures have clear windows, to keep dust and moisture from reaching the delicate mirrors inside. These windows may be glass; though I'm not sure. The mirrors redirect the light from the left and right front windows to the left and right halves of the camera's digital sensor. Unfortunately the images slightly overlap a bit at the sensor's centerline. The manufacturer has arranged the mirrors so that they swap the left and right images. When used with a film camera, prints made from the film will be in L/R order for viewing with a simple optical stereoscope, without cutting or remounting. For those of us who prefer cross-eyed viewing on a computer screen, this feature is wasted. It just requires us to run the pictures through StereoPhotoMaker to swap the images again and crop out the distracting overlap area. Even worse, as the instruction sheet warns, "...under certain conditions stray light may still enter the left mirror. This will appear as flare..." To keep the device compact and stylish, the front windows have inadequate light masking. Something like a lens hood should have been included in the design.
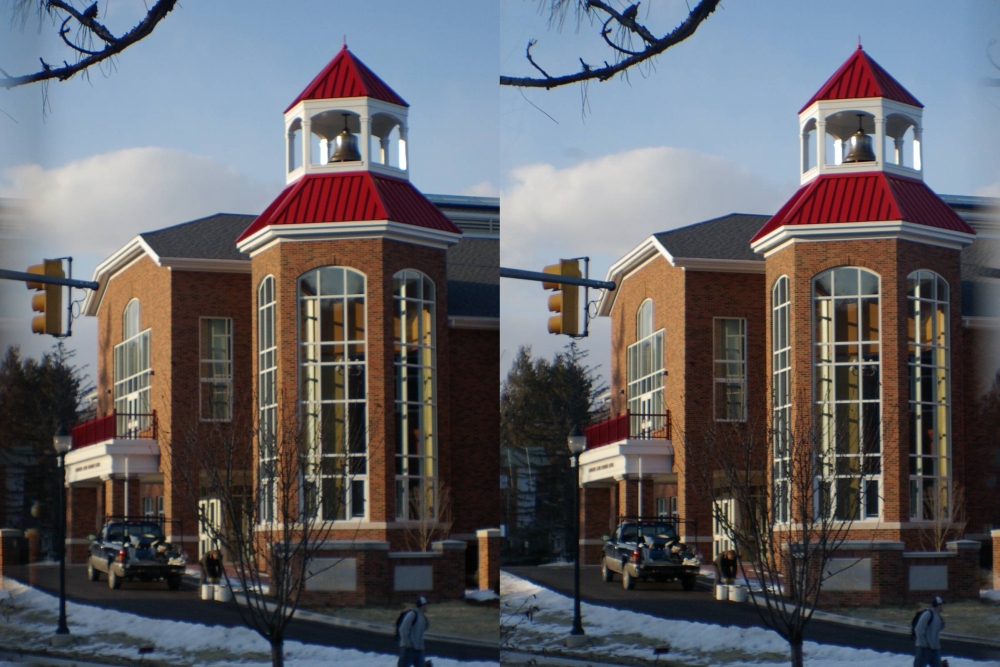
This picture reveals the limitations of this device. Even from across the street I could not get far enough away from this building to show more than a small portion of it. And then, being so far away, the building shows very little stereo depth, only the foreground tree branches betray that this is a stereo picture. Any device that splits the camera sensor into two parts necessarily reduces the horizontal angle of view by 1/2, and there's no way around it. Also, the taller-than-wide format isn't usually suitable for scenery and landscapes. At the left of one picture we see a darkening due to the fuzzy overlap area between the two images. That can be cropped out with StereoPhotoMaker, with a further loss of horizontal picture coverage.
So how about a subject that is taller than wide? This Indian totem pole should fit that frame.
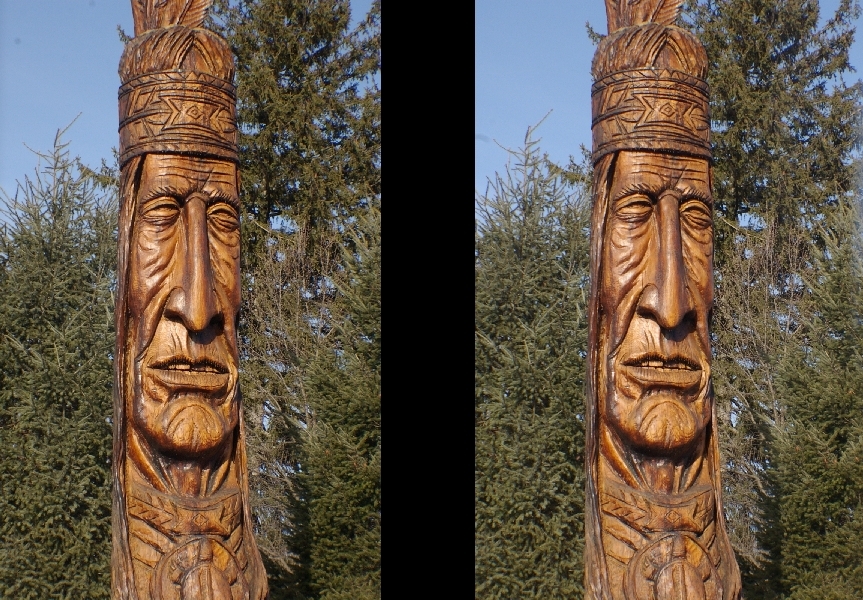
But he was too tall. He stands at the entrance to a city park. I'd have had to shoot him from across the street to show his full height (including the feathers in his headband), and then the photo would show even smaller 3d effect.
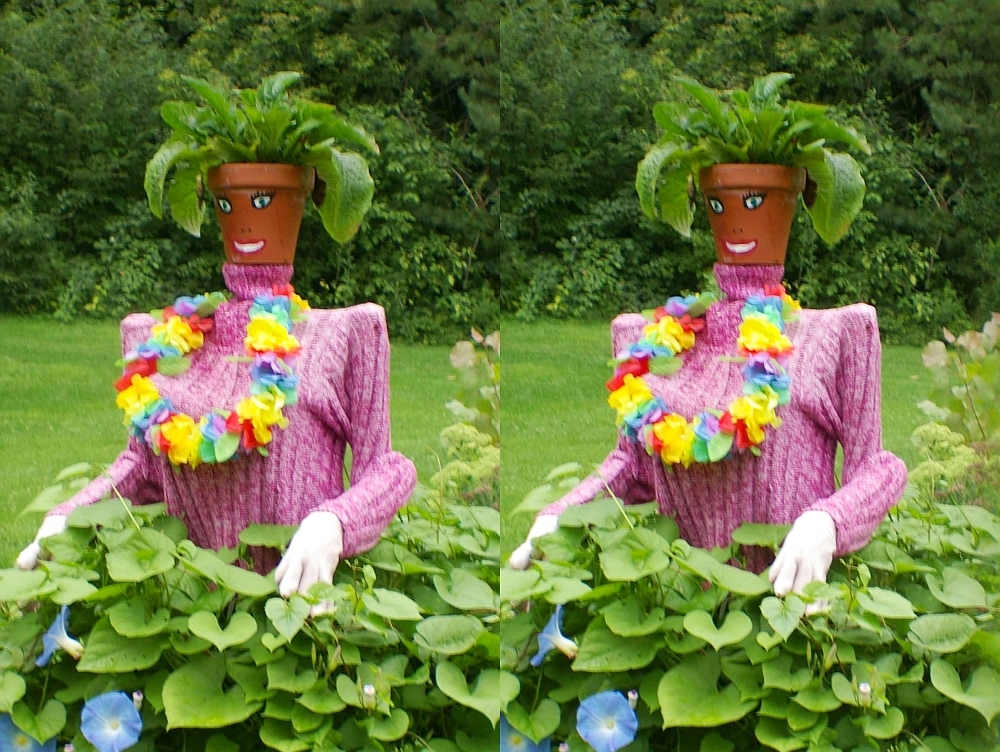
This whimsical gardener was at Kingwood Gardens in Mansfield, Ohio. An ideal subject for the Loreo.

Another stereo from Kingwood Gardens. Severely cropped top and bottom to a more pleasing square format.
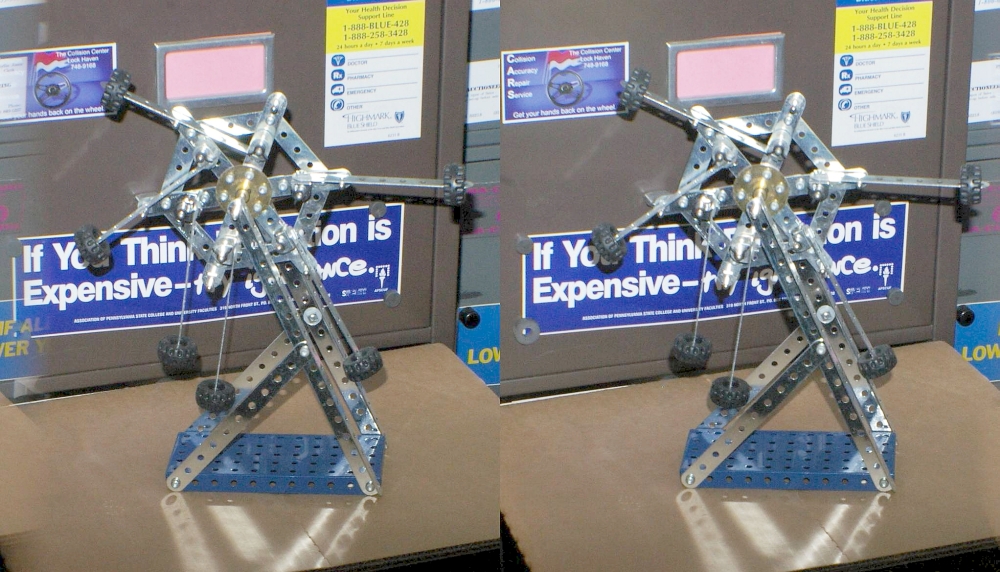
The Loreo excels for close and medium distance subjects, such at tis Erector/Meccano model of a classic perpetual motion machine. Some of the L/R overlap region remains at the left of the picture.
The Loreo adapter has two selectable apertures: f:16 and f:22. The inter-axial stereo separation is about 6 cm (a bit smaller than the human eye separation which averages 6.4 cm). This smaller interaxial reduces stereo depth somewhat, but isn't a real issue. It has three focus settings: close-up (1 to 2.5 meter), mid-range (2 to 6 meter), and far (5m to infinity). The close up range is useful for shooting smaller subjects, like miniature artworks and mechanical models. Another good use is portraits.
In summary, this device is a handy and lightweight accessory to add to your camera bag for those picture opportunities that cry out for 3d rendering, but may be unsuitable for the cha-cha method. With careful choice of composition it can produce interesting stereo pictures of quite acceptable quality for subjects at medium or close distances. Distant scenes and landscapes are less satisfying. You may find it hard, at first, to throw away so many pixels by cropping, but the results justify the sacrifice.
However, with a bit of modification, I have found other uses for the Loreo. See The Loreo 3d attachment as a macro 3d device.
Technical notes.
|
Readers have asked what's going on inside the Loreo beam splitter attachment. I have not disassembled one, and the Loreo company does not supply schematics, nor will they supply any technical information about the construction of their devices. However, the idea is an old one, which may be the reason they don't have a patent on it.
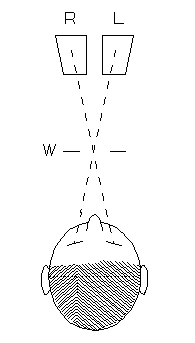
It's done with front-surface mirrors (metallized reflecting surface on the front surface of glass or plastic). The diagram shows one possible arrangement. Mirrors are shown in dark blue. Light takes the path ABCD and passes through a lens (or in some models, two lenses side by side) to form the left eye picture on the right half of the camera sensor. Light takes the path EFGH to form the right eye picture on the left half of the camera sensor. The lens also inverts both images.
I have shown only light rays from the center of each image. The dotted line xy represents the critical location of the edges of two mirrors, which determine the boundary between the two images on the sensor. In particular, the front edge of mirror G is reponsible for the location of this boundary, and because it is so close to the lens, it is not sharply defined. This is the reason for the dark boundary between the two images on the sensor, and is an unavoidable feature of all beam splitters of this sort.
This Loreo device uses two lenses side by side. The Loreo macro stereo device uses only one.
The diagram suggests why the Loreo device's housing is assymetric, for the mirror sizes and spacing must be carefully chosen to ensure that the light paths of the central ray for left and right eye are exactly the same length: ABCD = EFGH.
I make no representation that this diagram is the internal design of the Loreo devices, for I have not (yet) disassembled one. I am not revealing any corporate secrets. I find it strange that Loreo will not supply information about this, since anyone could take one apart and reveal all its secrets. If anyone has done this, I'd be interested in seeing pictures of its internal construction. In any case, the above information could serve as a guide to anyone who wishes to go to the challenging task of buildng such a device.
Another consideration the designer must be concerned about is to avoid introducing assymetric skew (keystone) distortion in the two images. I do not want to open that can of worms here.
My other web pages show how to make similar devices that do not flip the images left/right. In particular, my page on mirror devices is relevant here. Loreo has consistently used the L/R interchange of the pictures in their products, very likely so that prints made from film would be automatically oriented correctly for parallel axis viewing and require no special mounting and processing. That reason is of little weight with digital cameras and StereoPhotoMaker software. However, for the do-it-yourself builder, this design has another subtle advantage. The centerline between the two pictures is as sharply defined as it can be by the straight edge of the mirror G. In my mirror device it was necessary to bevel that edge of two mirrors at 45° to minimize the width of the dividing line, a tricky business for the amateur. It was necessary becase L and R pictures were both being imaged through a single camera lens.
All pictures on this page not otherwise credited are © 2008 by Donald E. Simanek.
Stereos for cross-eyed viewing in 3d Gallery One.
Still more, mostly taken with a digital camera in 3d Gallery Two.
Stereo view cards in 3d Gallery Three.
Home-built close-up stereo camera, 3d Gallery Four.
Review of the Loreo macro adapter, 3d Gallery Five B
The Loreo stereo attachment—improved 3d Gallery Five C.
The Loreo LIAC attachment as a 3d macro device, 3d Gallery Five D.
Wildlife photography in your backyard, 3d Gallery Six.
A home-built digital stereo camera using mirrors 3d Gallery Seven.
Stereo close-up photography in your garden 3d Gallery Eight.
Stereo photography in your aquarium 3d Gallery Nine.
Stereo digital infrared photography 3d Gallery Ten.
Wider angle stereo with the Loreo LIAC 3d Gallery ll. A failed experiment.
Review of the Fuji FinePix Real 3D W1 camera 3d Gallery 12.
Macrophotography with the Fuji 3D camera. 3d Gallery13.
Panoramic stereo photography. 3d Gallery 14.
Tips for stereo photography with the Fuji 3d camera. 3d Gallery 15.
Mirror methods for stereo photography. 3d gallery 16.
The Fuji 3d macro adapter using mirrors, by Paul Turvill.
The Fuji 3d macro adapter with flash! 3d gallery 17.
Critters in stereo. 3d gallery 18
Wide angle stereo. 3d gallery 19.
Telephoto Stereo. 3d gallery 20.
2D to 3d Conversion. 3d gallery 21.
Stereos from outer space. 3d gallery 22.
Review of the Panasonic Lumix 3d digital camera. 3d gallery 23.
Reverberant flash for shadowless lighting.
Shifty methods for taking stereo pictures.
Digital stereo photography tricks and effects.
Stereoscopy with two synchronized cameras by Mike Andrus.
Guidelines for Stereo Composition.
Return to the the 3d and illusions page.
Return to Donald Simanek's front page.
—Donald E. Simanek