The Loreo LIAC 3d attachment as a 3d macro device.
By Donald E. Simanek.
 |
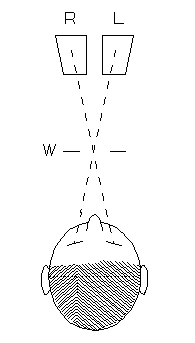
The stereo pictures below are presented for cross-eye free viewing. You should have a display screen at least 1000 pixels wide. The cross-eyed viewing method takes some people a while to learn, but is worth the effort, for stereo pairs may be presented on the page (or screen) much larger than with other free-viewing methods. To learn how to do this, see How to View 3d. At first, it helps to move your head farther from the screen until you can reliably fuse the two pictures, then move closer, slowly.
For the pictures with greater height, you can get a beter view in Microsoft Explorer by toggling the full screen view with the F11 key.
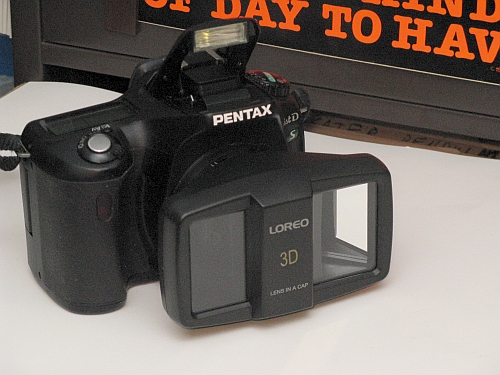
The Loreo "Lens in a Cap" (LIAC) beam splitter 3d attachements "out of the box" will only focus at distances greater than 1 meter (approximately 39 inches). In late 2008 Loreo released the Loreo macro adapter with smaller stereo base, capable of focusing from 9 inches to 32 inches. Back in the 1950s, when 3d film cameras proliferated, close up lens sets were available. These were specific to the particular brand of camera and not only did they allow for shorter distance from camera to subject, they were also prismatic, to cause convergence of the stereo axes. Those of us who were do-it-yourselfers, and cheap as well, accomplished the same thing with large lenses of diameter great enough for a single lens to cover both stereo lenses at once (about 3 or 4 inches diameter). This provided both decreased working distance and axial convergence. I happen to still have a 4 inch diameter lens large enough to cover the entire front of the Loreo attachment, duplicating this method exactly. The result isn't pretty, as seen below.
The convergence of the chief rays introduces keystone geometric distortion and also greatly exaggerates the depth. This might be fun for "comic" effects, but not for much else.
Obviously the digital camera's autofocus does not function with the Loreo attachments, but its auto-exposure does, even for flash exposures. The three manual settings are sufficient for most ordinary photos. Setting the camera on "aperture priority" and autoexposure selects the shutter speed. This picture should have been taken with bounce flash instead of direct flash, and a plain background would have been better.
There is another way to shorten the working distance of the Loreo to about 1 meter or less without severe spatial distortion.

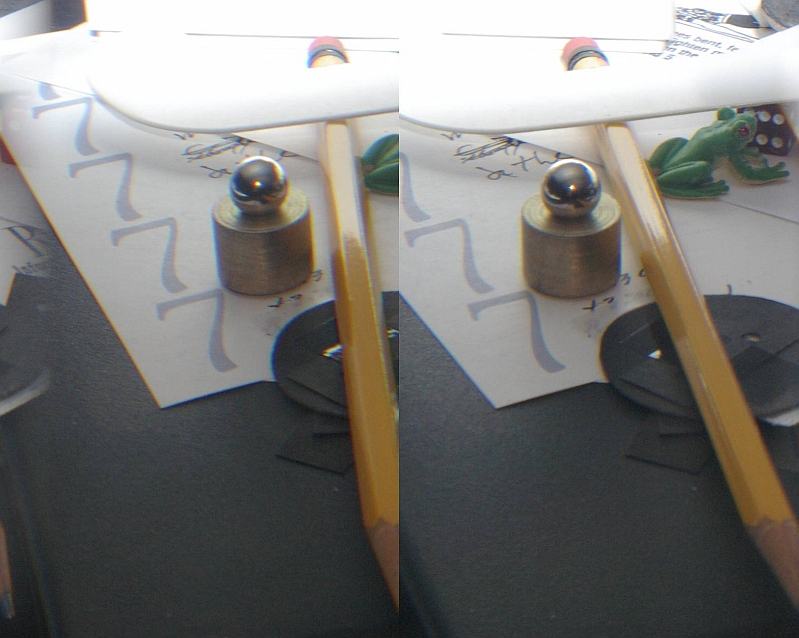
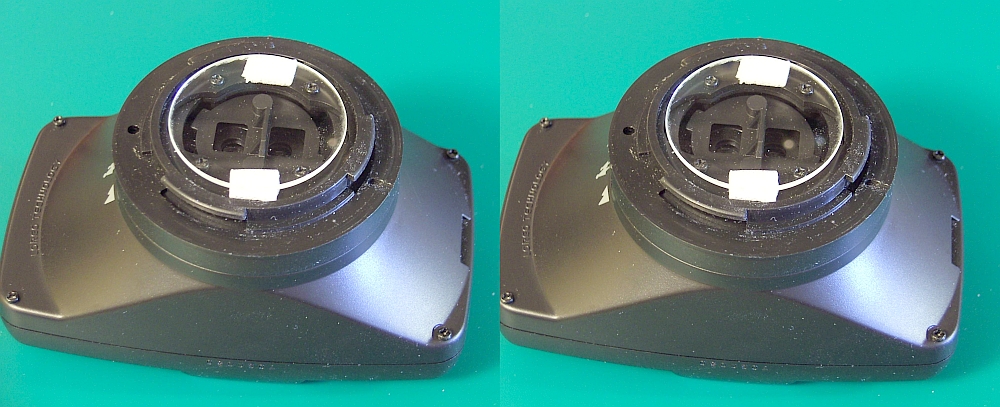
How was this done? A supplementary lens of 1.37 diopter was placed at the back of the adapter with two pieces of poster tape. [Nothing special about that value, I just happened to have one handy.] With my Pentax 1sDS camera this does not interfere with the camera mirror's motion, but you should check your camera's design carefully and make some measurements before attempting this.
The subject distance in the picture above is about 1 meter, which just about conforms to the 1/30 rule for axial separation of 2 inches. Since the horizontal field angle of view is still about half normal, the picture does not display excessively exaggerated depth. The pictures must be cropped in width more than usual, using StereoPhotoMaker, or similar, software. Anticipate this when framing the picture. You will crop away as much as half the picture area.
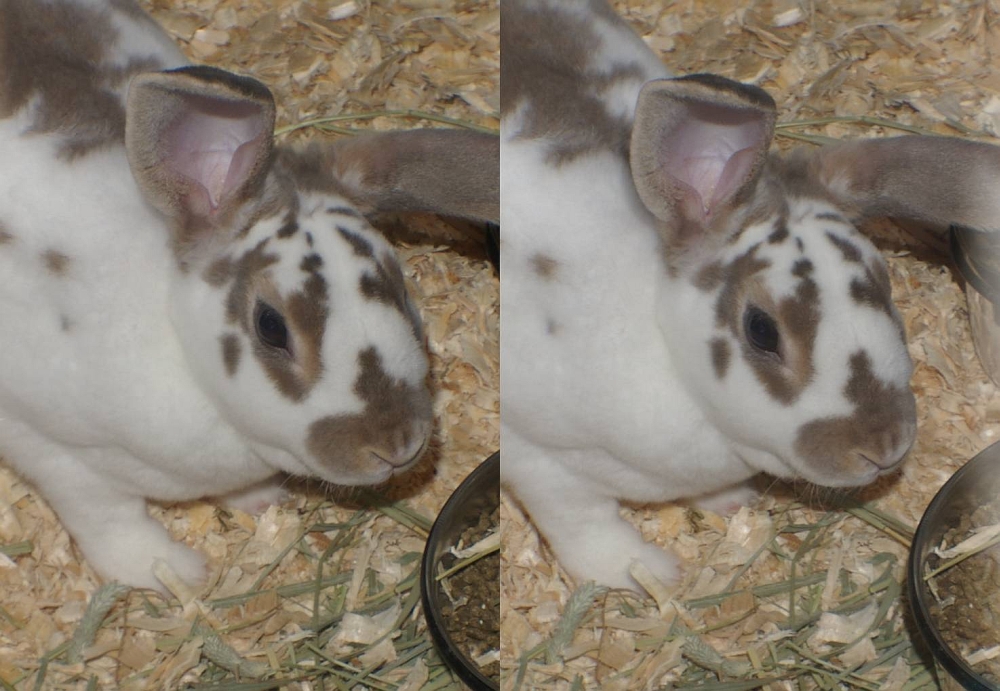
This rabbit was photographed in a pet shop. It illustrates that the modified Loreo LIAC could be useful for this size subject.
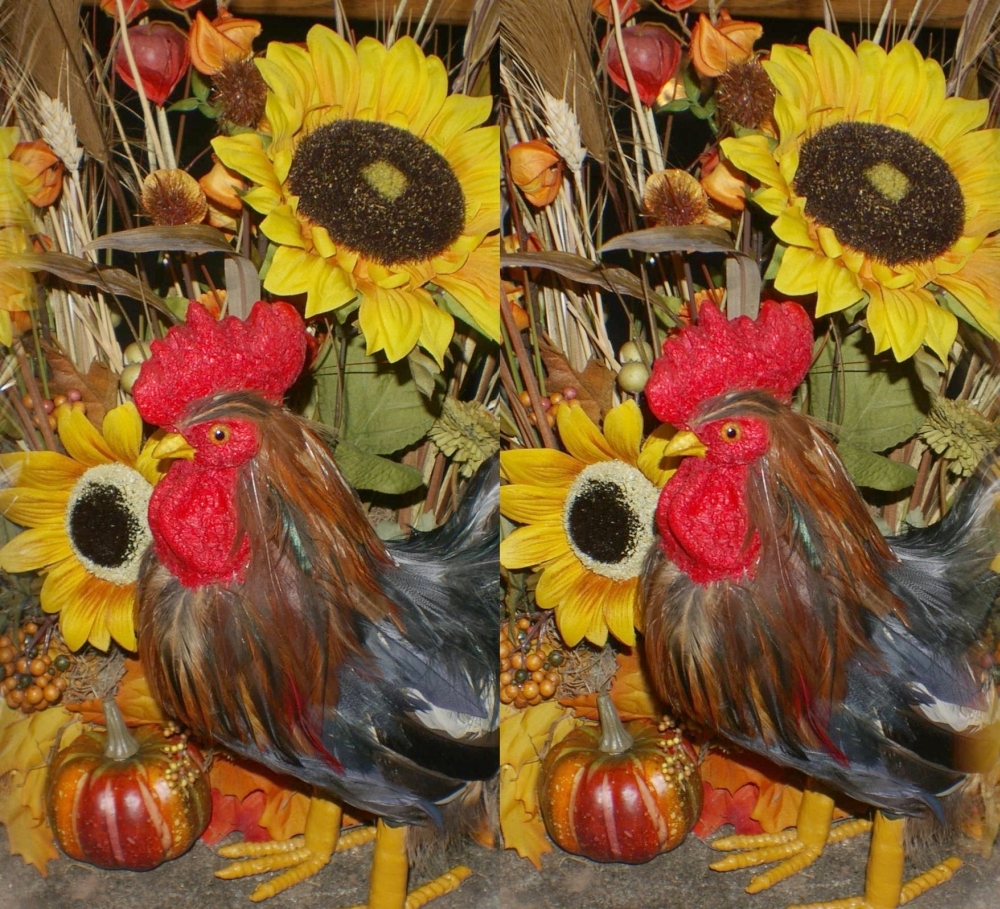
This flower arrangement was photographed at a garden show.
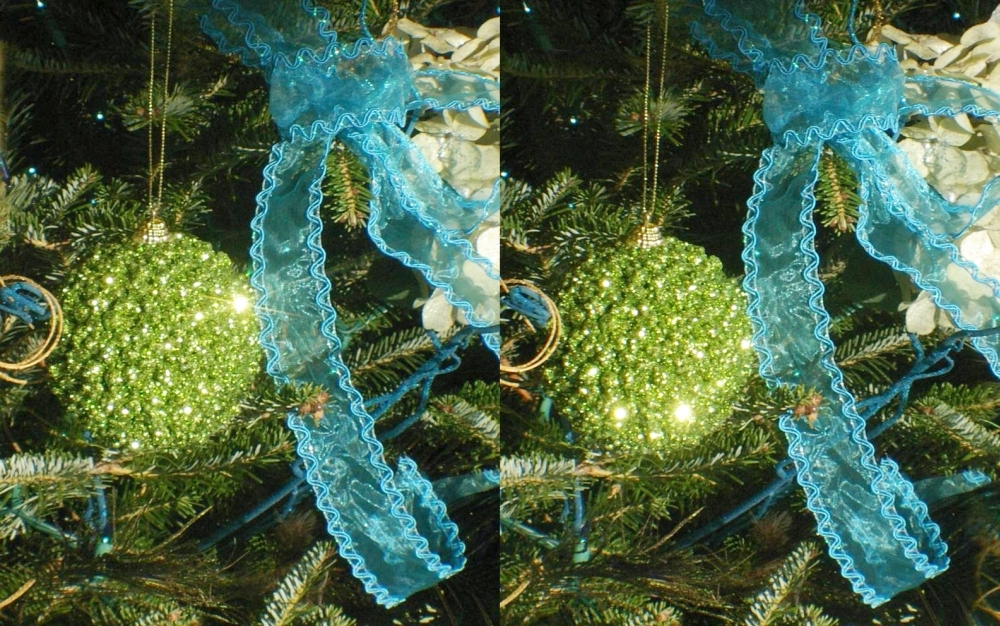
This Christmas tree ornament sparkles in the light of the on-camera flash, just as it would appear to the eye. The reflecting facets of the ornament can reflect light directionally, so some are seen brightly by one eye but not the other. The crystaline surface of snow in sunlight shows the same effect in stereo.
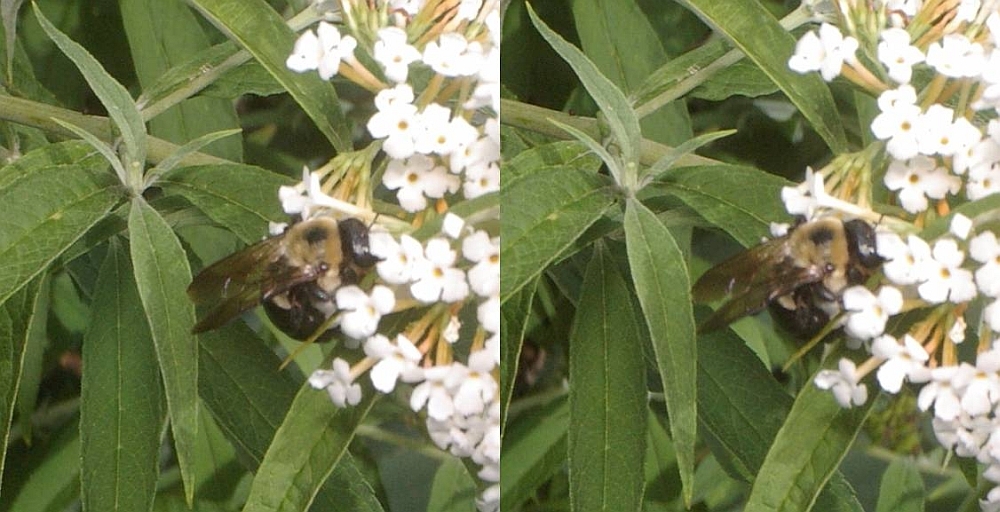
Back to the garden, this picture of a bumblebee again shows the avantage of this easy-to use modified beam splitter adapter for macro photography of small wildlife. This was cropped quite a bit.
So, if you paid $110 for a Loreo stereo adapter and were wondering what useful task you might put it to, here's the answer. The modification is non-destructive and it won't cost much, either.
—Donald E. Simanek
All pictures on this page not otherwise credited are © 2008 by Donald E. Simanek.
Stereos for cross-eyed viewing in 3d Gallery One.
Still more, mostly taken with a digital camera in 3d Gallery Two.
Stereo view cards in 3d Gallery Three.
Home-built close-up stereo camera, 3d Gallery Four.
Review of the Loreo stereo attachment 3d Gallery Five.
Review of the Loreo macro adapter, 3d Gallery Five B
The Loreo stereo attachment—improved 3d Gallery Five C.
Wildlife photography in your backyard, 3d Gallery Six.
A home-built digital stereo camera using mirrors 3d Gallery Seven.
Stereo close-up photography in your garden 3d Gallery Eight.
Stereo photography in your aquarium 3d Gallery Nine.
Stereo digital infrared photography 3d Gallery Ten.
Wider angle stereo with the Loreo LIAC 3d Gallery ll. A failed experiment.
Review of the Fuji FinePix Real 3D W1 camera 3d Gallery 12.
Macrophotography with the Fuji 3D camera. 3d Gallery13.
Panoramic stereo photography. 3d Gallery 14.
Tips for stereo photography with the Fuji 3d camera. 3d Gallery 15.
Tips for stereo photography with the Fuji 3d camera. 3d Gallery 15.
Mirror methods for stereo photography. 3d gallery 16.
The Fuji 3d macro adapter with flash! 3d gallery 17.
Critters in stereo. 3d gallery 18
Wide angle stereo. 3d gallery 19.
Telephoto Stereo. 3d gallery 20.
2D to 3d Conversion. 3d gallery 21.
Stereos From Outer Space. 3d gallery 22.
Review of the Panasonic Lumix 3d digital camera. 3d gallery 23.
Reverberant flash for shadowless lighting.
Digital stereo photography tricks and effects.
Shifty methods for taking stereo pictures.
Guidelines for Stereo Composition.
![]()
Input and suggestions are welcome at the address shown to the right.
Return to the the 3d and illusions page.
Return to Donald Simanek's front page.