Stereo Pictures for Cross-Eyed Viewing.
These galleries document and illustrate various ways to take stereo pictures with film and digital cameras, using home-built adapters. Most of these methods require no special construction skills and very small expense.These galleries presume some prior knowledge of stereo photography. Those new to this form of photography can get a painless tutorial at Life & Depth: An Introduction to Stereo Photography. See also Stereo Photography by Fritz G. Waack.
More cross-eyed stereos in 3d gallery Two.
Antique stereo view cards in 3d Gallery Three.
Building a digital stereo close-up photography system in 3d Gallery Four.
Review of the Loreo stereo attachment 3d Gallery Five.
Review of the Loreo macro adapter, 3d Gallery Five B
The Loreo stereo attachment—improved 3d Gallery Five C.
The Loreo LIAC attachment as a 3d macro device, 3d Gallery Five D.
Wildlife photography in your backyard, 3d Gallery Six.
A home-built digital stereo camera using mirrors 3d Gallery Seven.
Stereo close-up photography in your garden 3d Gallery Eight.
Stereo photography in your aquarium 3d Gallery Nine.
Stereo digital infrared photography 3d Gallery Ten.
Wider angle stereo with the Loreo LIAC 3d Gallery ll. A failed experiment.
Review of the Fuji FinePix Real 3D W1 camera 3d Gallery 12.
Macrophotography with the Fuji 3D camera. 3d Gallery13.
Panoramic stereo photography. 3d Gallery 14.
Tips for stereo photography with the Fuji 3d camera. 3d Gallery 15.
Mirror methods for stereo photography. 3d gallery 16.
The Fuji 3d macro adapter with flash! 3d gallery 17.
Critters in stereo. 3d gallery 18
Wide angle stereo. 3d gallery 19.
Telephoto Stereo. 3d gallery 20.
2D to 3d conversion. 3d gallery 21.
Stereos from outer space. 3d gallery 22.
Review of the Panasonic Lumix 3d digital camera. 3d gallery 23.
Reverberant flash for shadowless lighting with no stereo shadow.
Shifty methods for taking stereo pictures.
Digital stereo photography tricks and effects.
Guidelines for Stereo Composition.
Return to the the 3d and illusions page.
Return to Donald Simanek's front page.
Close up photography and macro photography.
First some definitions of technical terms:
- Normal photography is generally that in which the subject is at least six feet from the camera. Simple non-focusing cameras typically operated at apertures in which everything from 6 feet to infinity was in fairly good focus.
- Close-up photography has the subject in the range from a few inches to 6 feet from the camera.
- Macro photography was traditionally defined as that in which the image on the film has a magnification greater than 1. That is, the subject's image on the film is larger than the subject.
- Micro Photography is the process of making reduced size reproductions on film, as when making microfilms for storage of documents.
- Photomicrography is photography through a microscope.
Viewing these pictures.
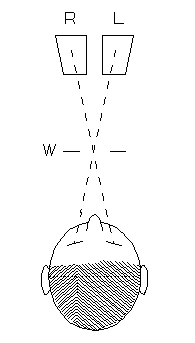
The cross-eyed viewing method takes some people a while to learn, but is worth the effort, for stereo pairs may be presented on the page (or screen) much larger than with other free-viewing methods. To learn how to do this, see How to View 3d. At first, it helps to move your head farther from the screen until you can reliably fuse the two pictures, then move closer, slowly.Any of these can be made into stereo view cards for viewing in an old fashioned Holmes stereoscope. Just print the picture pair on photo paper with a color inkjet, so that the pair occupies 6 inches width on the paper. Then cut the pictures apart, interchange them left to right and affix them side by side onto a card 7 inches wide and 3.5 inches high (or more if needed). Then slip them in your stereoscope.
These pages require a monitor width of at least 1000 pixels in order to see both images for cross-eyed stereo viewing. Since the photos also have large vertical dimension, it helps to toggle the "full screen" view (F11 in Windows). However, if you haven't mastered the cross-eyed viewing method, these may also be appreciated as 2d flat photos. All are copyright by Donald Simanek. Most were taken with homebuilt 3d digital camera attachments.
Stereo close-up photography with film.
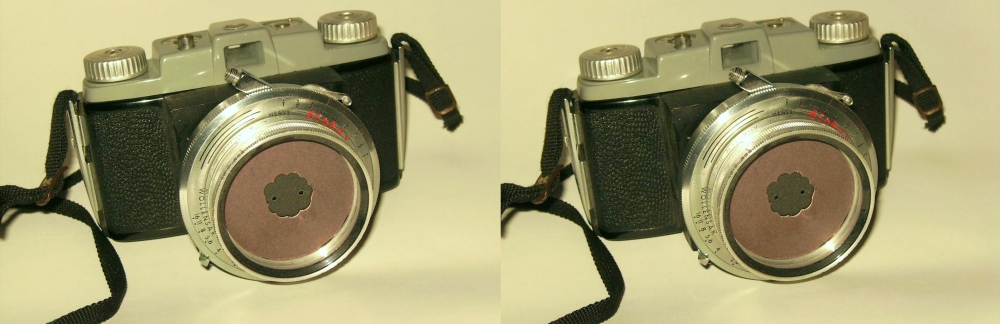
Many of these pictures were taken with a home-brew close-up stereo camera I called the "Bug Shooter I". The lens was removed from an old folding camera, and a press camera shutter put in its place. Behind the shutter were two 50mm matched lenses with 1/64 inch diameter holes serving as the light-admitting aperture. The front was covered with plain glass to keep out dust. The lenses were oriented so that the two pictures were side by side on 120 size film, but oriented diagonally to give them extra width (for latter cropping). A rigid black metal septum inside the bellows kept light from spilling across to the wrong picture. Light was provided by two electronic flash units, one synched to the shutter, and one fired by a solid state circuit that sensed the light of the other flash. In this picture, the light box shows a strip of undeveloped film, and several stereo pairs mounted in Realist standard mounts. The pictures were wide enough that they could also be mounted in European wide format mounts. Either format can be viewed in the standard TDC viewer shown on the table.

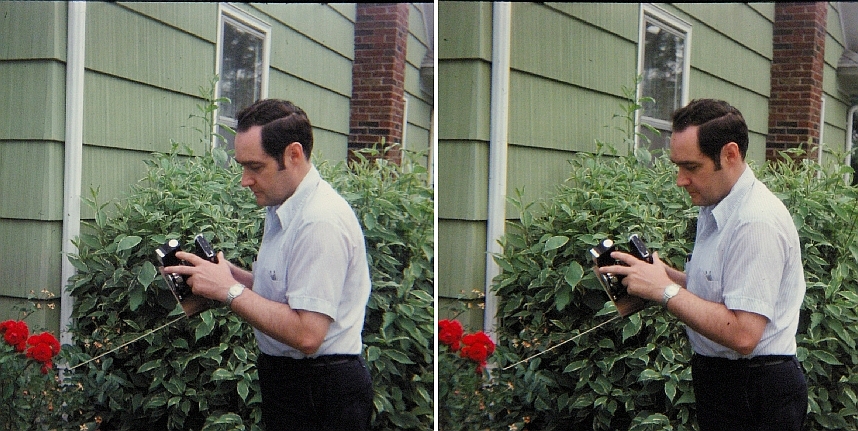
In use the camera is held at 45°, with a bent coat-hanger indicating the distance from camera to subject for best focus. The aperture was calculated for the film used (Ektachrome), the working distance, and the flash units used. My wife, Connie, took this picture of me in 1976, using a Verascope camera.
Later a 35mm film version was made, Bugshooter II, using a Kodak Pony body with its aperture plate widened to 10 perforations to accomodate a side by side 5 perf. standard format stereo pair. This also required some hacksaw and file surgery on the very tough bakelite interior of the camera body. A press camera shutter housed the two 50mm stereo lenses.
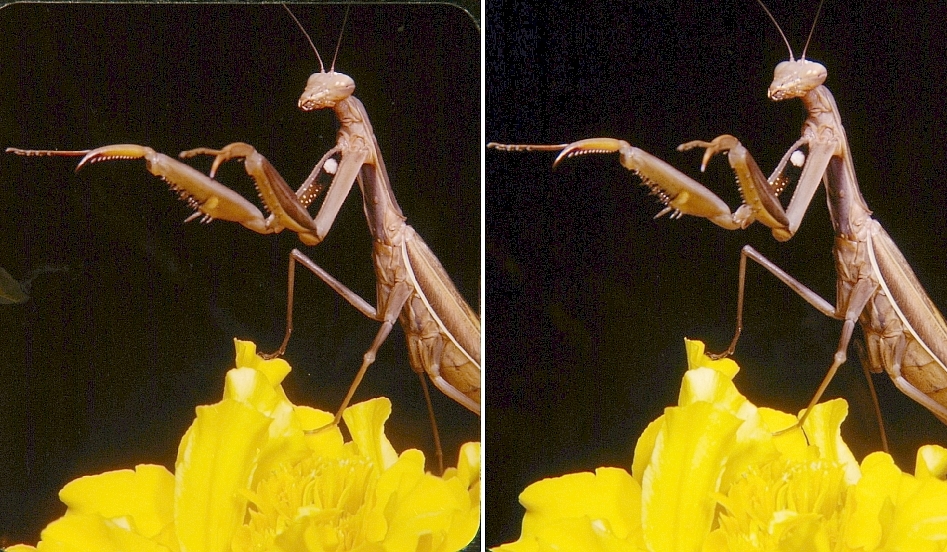
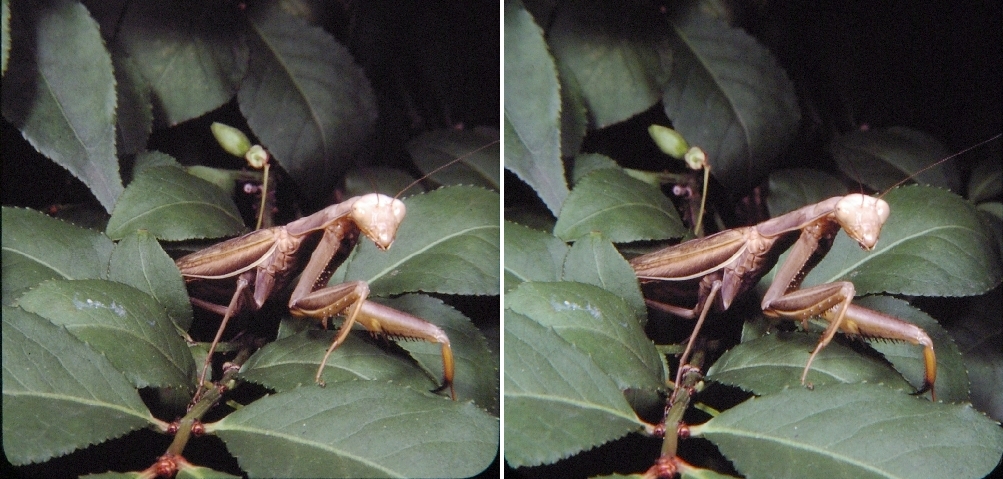
Typical subjects were flowers, insects and small animals. This praying mantis was a willing subject, not a bit camera shy, but didn't take directions well.
Here she's in a busier setting.
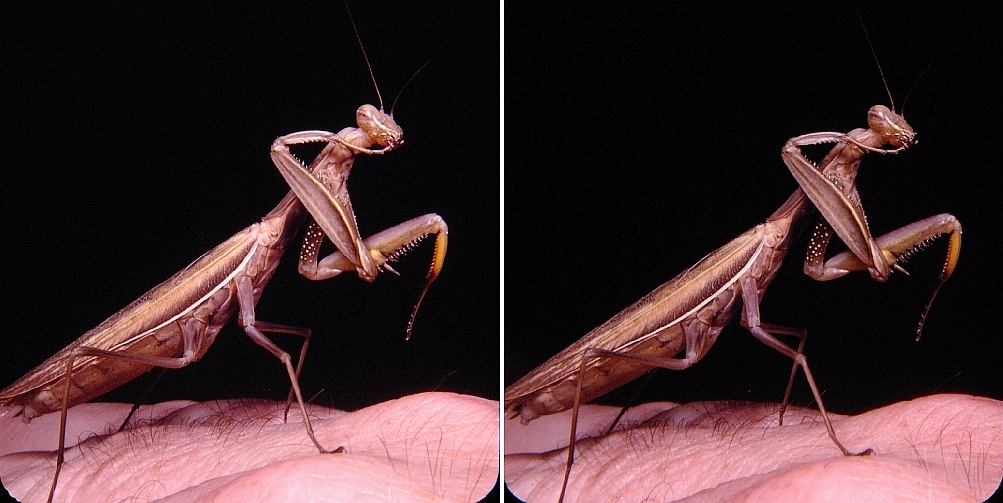
She was even happy to pose on my hand.
This arachnid, the harvestman, is commonly called "daddy long legs". Compare the 2d and 3d views. 3d brings out the very slender legs.

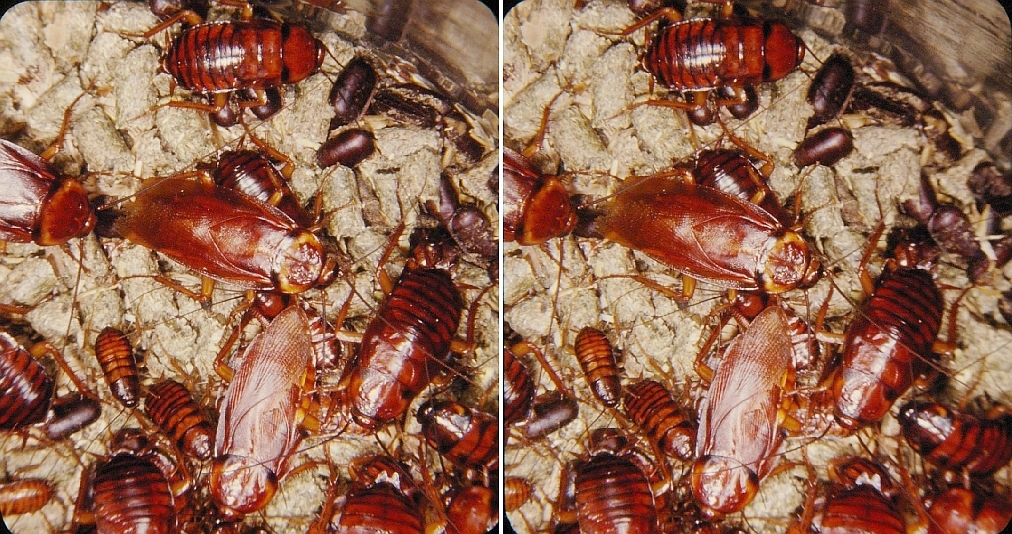
This cockroach convention was in a laboratory jar in biologist Tim Yoho's office. He kept cockroaches to feed to his pet tarantula.
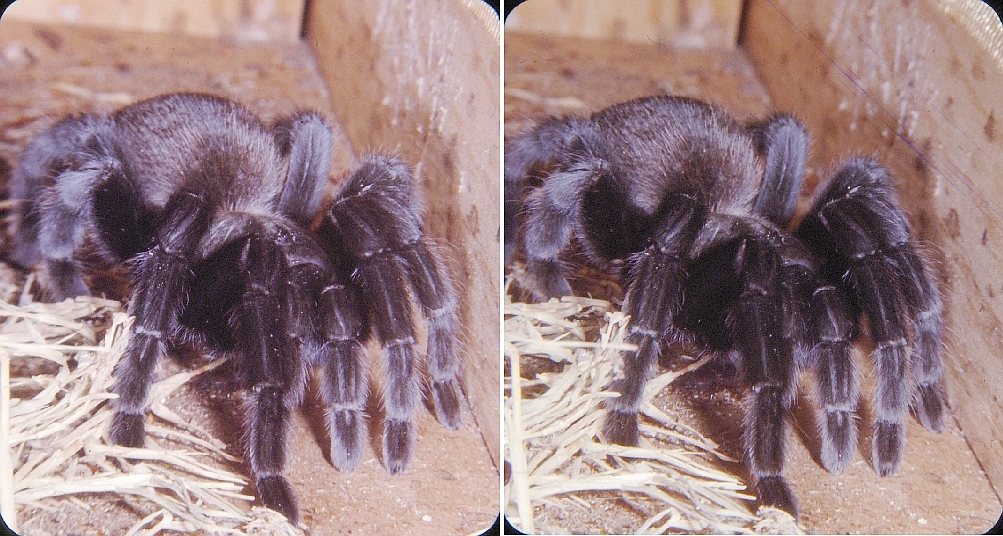
Here's the tarantula, named "Snert". Most people don't like cockroaches. Snert loved cockroaches. It was fun to watch a cockroach cower in the corner, not knowing when Snert would get hungry for a crunchy snack.
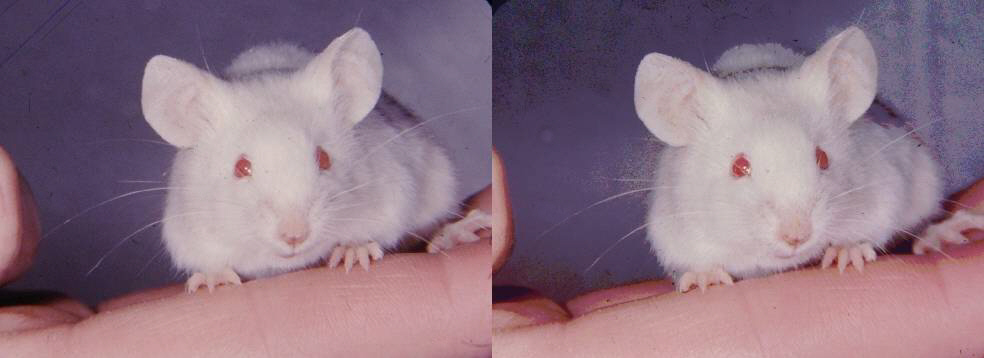
A laboratory mouse made a willing subject, posing on my hand. This was taken on Ektachrome in 1978, and some fading has altered the colors. This is not a case of camera "red-eye". The mouse is an albino, and its eyes are pink.
Pictures taken with standard stereo cameras.
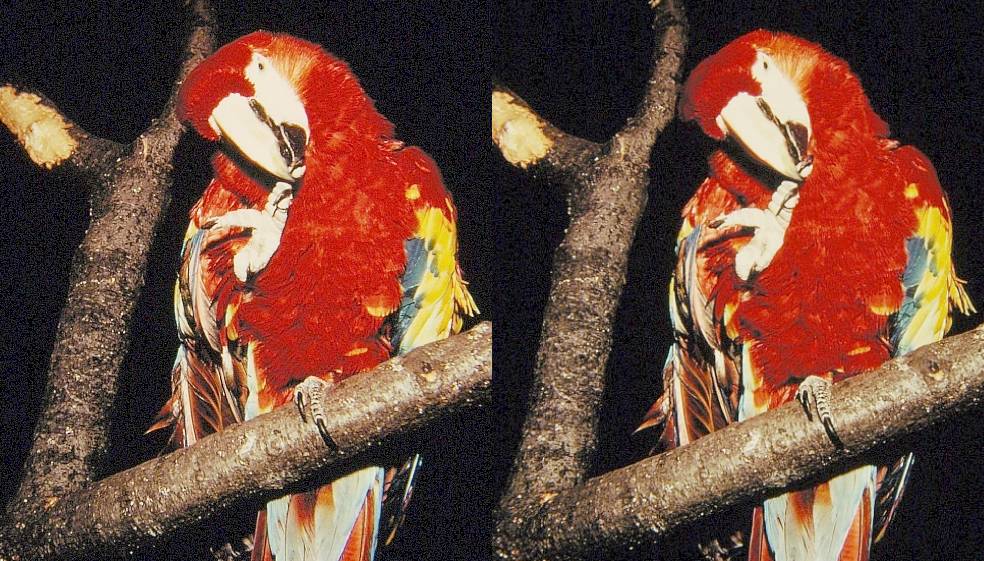
The following pictures were taken with commercially available stereo cameras. The parrot at the Philadelphia flower show was taken with a Realist, using Kodachrome and electronic flash. He's showing off by nibbling his toe.
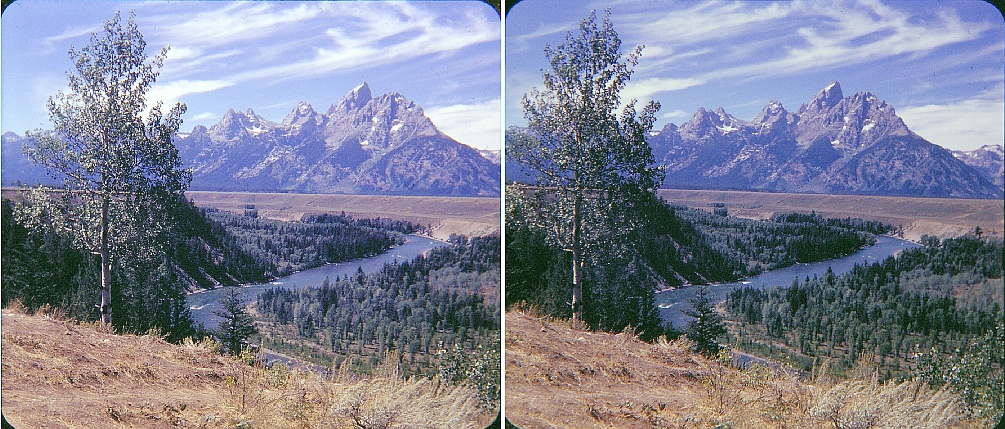
One of the most photographed sites in the USA—The Snake River bend in the Grand Tetons of Wyoming. Verascope camera. September, 1971.
Minerva Terrace in Yellowstone National Park, 1971, taken on Kodachrome with a Verascope camera. At these high altitudes on sunny days your exposure meter will indicate the scene is two stops brighter than you are used to. Believe the meter, or you will get overexposed pictures. Notice how dark the sky appears. This is simply because of the smaller f-number used, no polarizing filter was used.

The copying system.
I see many references on the web to copying old pictures from film transparencies to digital. Usually people seem to use a commercial service, or a dedicated scanner. To me this seems unsatisfactory and unduly expensive. Some scanners can't handle mounted slides, can't deal with unusual slide mounting sizes, and may not yield the resolution you'd like. Commercial services may have the same problems, and are rather expensive.The solution for me was "do it yourself". After all, I had a digital camera that could do close focusing, easily capable of imaging the small size of a 35mm transparency. It has auto-exposure and auto-focus. So what's the big deal that makes some people think film to digital conversion is difficult?
This picture below was a quick shot of my copying setup. It was taken with an Intel bottom of the line camera, little more than a webcam. Its internal flash was deflected with a white card to bounce off the ceiling, and a shift of only 1.5 inches between the left and right images, using the tripod slot as a slide bar. The rather strange colors are due to mixed lighting of incandescent and electronic flash. On-camera flash is not good for slide-bar stereos, for the position of the flash shifts with the camera. Therefore this flash was scattered from celing and surroundings for nearly shadowless lighting.
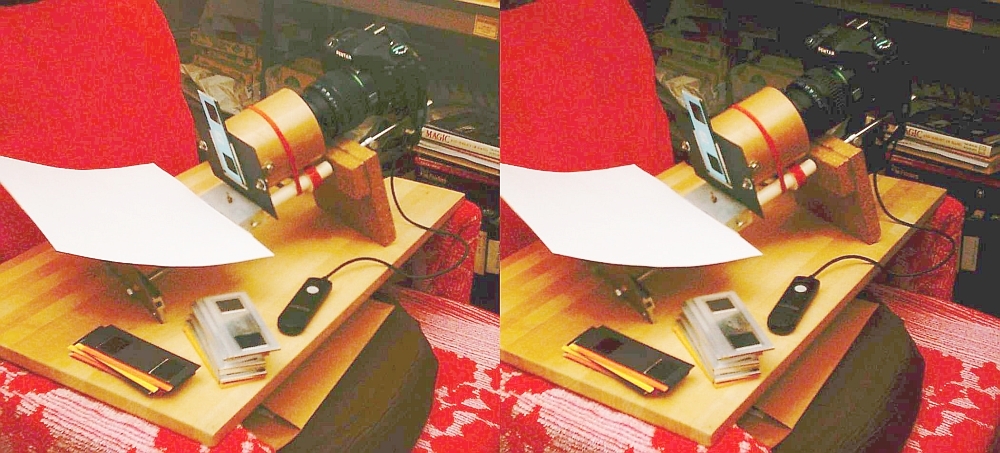
The copier uses a 1st-DS Pentax Digital SLR, with its basic lens set at a focal length of 55 mm. The camera is set for tungsten balance, ISO 800, and aperture priority at f:16. I use a modest 4 megapixel resolution, which is more than enough for pictures to be presented in this size. But the camera has the option of 6 mp. A weak positive supplementary lens is screwed onto the front of the lens. The distance from it to the slide holder is 3.5 inches. The film holder is on the black steel plate, and the stereo slide is positioned by the three long magnets placed on that plate. The brown heavy cardboard tube keeps out stray light, and is blackened inside. An "optical bench" holds it all together, on two rails, scavenged from another project. The white paper scatters light from two overhead 60 watt tungsten lamps. A remote shutter release cable is used because the exposures are long, and you don't want vibration or shifting of any components.
My original idea was to use flash illumination with a diffusing glass. Then I asked myself "Why waste the batteries?" I like to keep things simple—and cheap.
The camera's auto-exposure and auto-focus do a reliable and consistent job with either cardboard or glass mounted slides. Once the camera is aimed and solidly positioned, you can dupe slides without ever having to look through the viewfinder. I do one image at a time, then combine them into stereo with the free StereoPhotoMaker software. Oh, yes, I do have to rotate the images 90° first, but most image editors can do that easily.
Most of my stereo slides are glass mounted. I'm not about to unmount them for copying and then remount them. I just clean any fingerprints off the glass, make sure there's no dust on it, and then do the copying. The glass presents no problem whatsoever. Some of my slides have anti-newton glass on the emulsion side. That cause no problems either.
You may wonder about the white reflector lying at a low angle. Shouldn't it be perpendicular to the camera axis? No need for that. Lambert's law tells us that the intensity of light from a perfect scatterer is the same in all directions, and white paper reflects nearly as a Lambert scatterer. So its angle doesn't matter so long as it is uniformly illuminated from the pole lamp above (not visible in the picture). The transparency will be uniformly backlighted.
Frankly I can't see why anyone would even think of doing film to digital conversion any other way.
Other viewing methods.
These pictures may be printed with a color printer, in landscape mode, on 8.5 x 11 inch photo paper.These pictures may be printed, sized at 6 inches width (3 inches for each of the two pictures), then the images cut apart, switched right to left and mounted on 3.5 x 7 inch stiff cards. This is the old-fashioned "stereo view card" format which may be viewed with an antique Holmes stereoscope. Modern stereoscopes are also available for this format. The viewers used to view aerial photographs may also be used.
All pictures © 2008 by Donald E. Simanek.
More cross-eyed stereos in 3d gallery Two.
Stereo view cards in 3d Gallery Three.
Building a digital stereo close-up photography system in 3d Gallery Four.
Review of the Loreo stereo attachment 3d Gallery Five.
Review of the Loreo macro adapter, 3d Gallery Five B
The Loreo stereo attachment—improved 3d Gallery Five C.
The Loreo LIAC attachment as a 3d macro device, 3d Gallery Five D.
Wildlife photography in your backyard, 3d Gallery Six.
A home-built digital stereo camera using mirrors 3d Gallery Seven.
Stereo close-up photography in your garden 3d Gallery Eight.
Stereo photography in your aquarium 3d Gallery Nine.
Stereo digital infrared photography 3d Gallery Ten.
Wider angle stereo with the Loreo LIAC 3d Gallery ll. A failed experiment.
Review of the Fuji FinePix Real 3D W1 camera 3d Gallery 12.
Macrophotography with the Fuji 3D camera. 3d Gallery13.
Panoramic stereo photography. 3d Gallery 14.
Tips for stereo photography with the Fuji 3d camera. 3d Gallery 15.
Mirror methods for stereo photography. 3d gallery 16.
The Fuji 3d macro adapter with flash! 3d gallery 17.
Critters in stereo. 3d gallery 18
Wide angle stereo. 3d gallery 19.
Telephoto Stereo. 3d gallery 20.
2D to 3d conversion. 3d gallery 21.
Stereos from outer space. 3d gallery 22.
Review of the Panasonic Lumix 3d digital camera. 3d gallery 23.
Reverberant flash for shadowless lighting.
Shifty methods for taking stereo pictures.
Digital stereo photography tricks and effects.
Guidelines for Stereo Composition.
![]()
Input and suggestions are welcome at the address shown to the right.
Return to the the 3d and illusions page.
Return to Donald Simanek's front page.