Homebuilt Digital Stereo With Mirrors.
Digital Stereo Macrophotographs for Cross-Eyed Viewing.
by Donald E. Simanek.
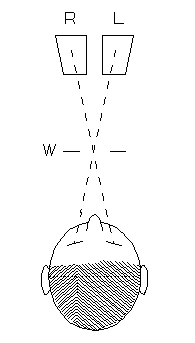
This page requires a monitor width of at least 1000 pixels in order to see both images for cross-eyed stereo viewing. Since the photos also have large vertical dimension, it helps to toggle the "full screen" view (F11 in Windows). However, if you haven't mastered that viewing method, these may also be appreciated as 2d flat photos. All are copyright by Donald Simanek. These were taken with the homebuilt 3d digital camera attachment described below.Until recently no commercial stereo digital cameras were available, so stereo photographers had to make their own. One approach is to mount two cameras side by side, and synchronize their shutters (and flash). Synchronization is necessary if you wish to photograph anything that moves. Many websites describe how to do this.
I chose another route, using one camera. The advantage is that you don't have to fuss with the tricky job of synchronization. In previous galleries I describe ways to put a stereo pair on the camera sensor. For comparison, let's look at two of these.
 |  |
| Taken with the Loreo beamsplitter. Pictures in order L R. | Taken with the bugshooter. Pictures in order R L. |
|---|
While the macro stereo attacments described in my earlier galleries produce a stereo image that is 1.5 times as high as wide, which is ok for portraits and close-ups, it's not ideal for medium distances and landscapes. So I adopted an old idea used in some commercial beam splitting adapters, and also in some 1980s 3d movies. It is a mirror beam splitter that rotates both images 90° and records them "head to head" on the camera's sensor.
With this stereo attachment, the camera's autofocus and auto-exposure systems still function properly.
Here's the prototype adapter.
Here's how the pictures come out:
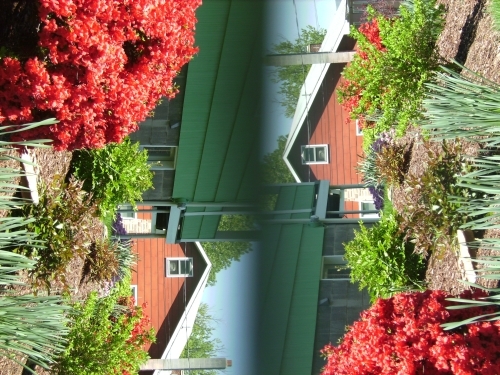
Run this through the free Stereo Photo Maker Software, using the Tri-Delta HH setting, and you get this:

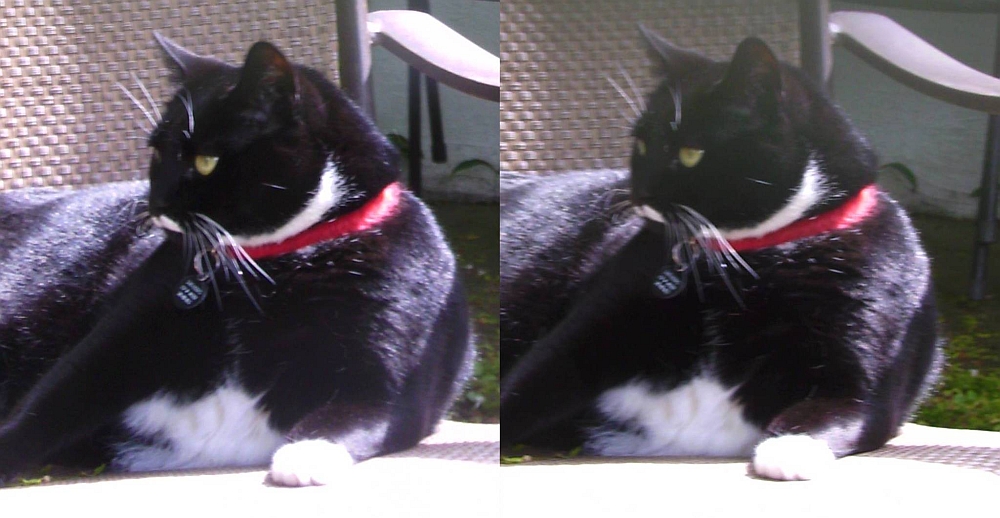
Black cats are difficult subjects, especially with the smaller tonal range of digital cameras.
Memorial day weekend brings campers and fishermen to Bald Eagle State Park. Here's some late evening shots, just before dusk.


The whole point of constructing this device was to take digital stereo of moving subjects. Here's a test with flowing water, using a shutter speed slow enough to prevent the water appearing "frozen". Taken in late afternoon on overcast day in a narrow stream cut that doesn't get much sun anytime.

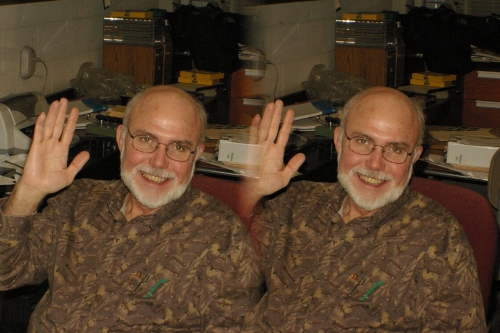
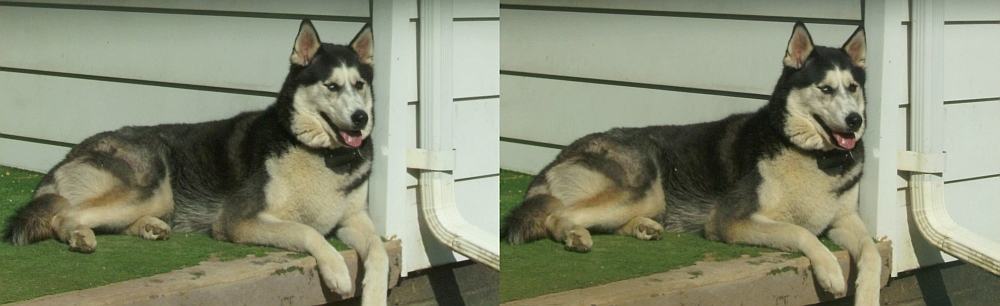
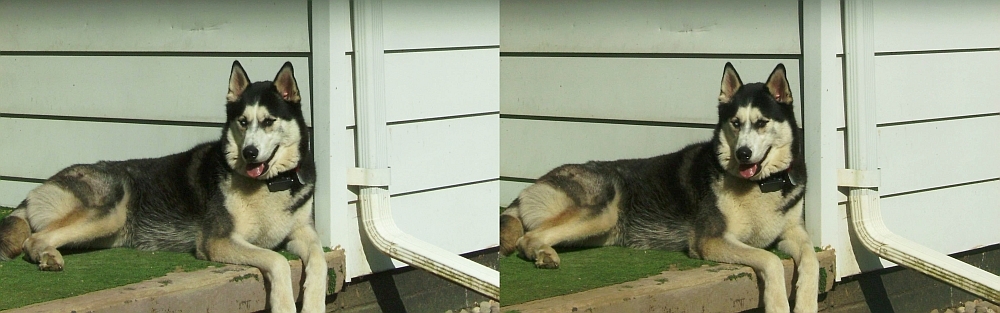
The neighbor's dog, Uri, was in a cooperative mood (usually he's quite frisky).
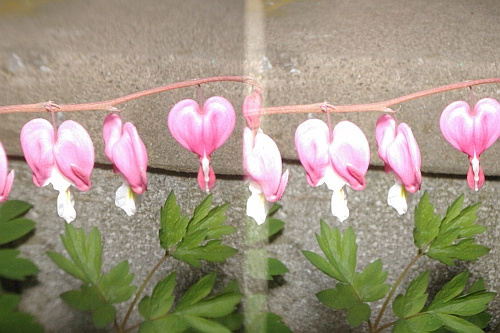
If some of these pictures aren't prize winners, it's partly because I am trying to push the limits of the camera. Here, I tried to get good sharp images from a few feet distance to infinity. I also wanted a "widescreen" format. Taken just after a rain shower. Included are Iris, Columbine and Cusa Dogwood. Water drops can be seen on the Iris in the original picture, which was over 4000 pixels wide (both frames side by side), then reduced to 1000 pixels wide to fit on 1028 pixel wide screens.

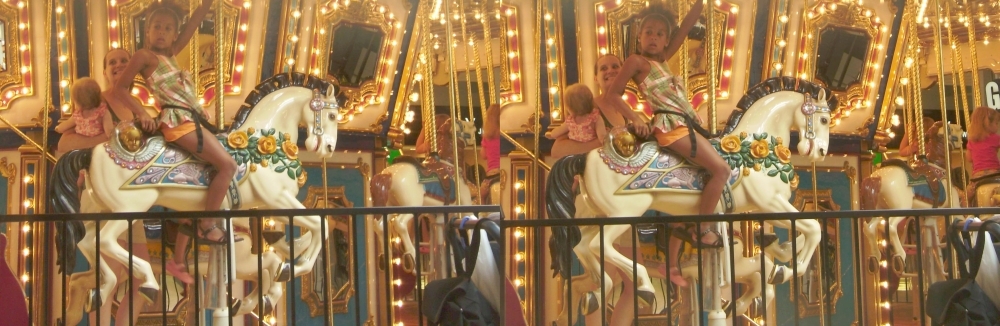
An enthusiastic equestrian on a carousel. This was indoors, in a mall, where flash was not allowed. These are not ideal conditions for shooting moving subjects, especially with this inexpensive digital camera. Many shopping malls prohibit photography for security reasons, but this mall allows photographing only the carousel, nothing else. A security guard came over while I was shooting pictures, but only to satisfy his curiosity about the strange device I was using.
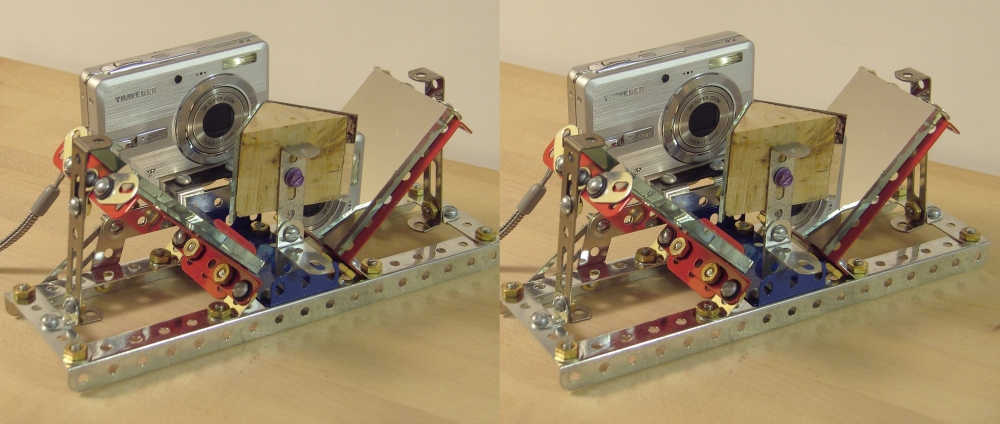
Construction details for the mirror 3d system.
The camera "attachment" is bigger than the camera. Meccano and Erector steel construction set parts were used for the frame. Two 3 x 4 inch front surface mirrors are on the outside. Two smaller 1.5 inch square front surface mirrors at right angle to each other form the interior beam splitter. The outer mirrors are also at right angles to each other.
Adjusting the tilt of the larger mirrors controls the horizontal separation of the final stereo images after they have been rotated back into viewing orientation. Adjusting the rotation of the smaller mirror assembly controls the vertical alignment of the images in their final viewing orientation. Shifting the camera sidewise controls the position of the dividing line between the images on the sensor. Once you've found the optimal positions, it's best to lock them in place and not tinker with them later.
This isn't yet perfected. In the earlier pictures the dividing line is too wide because of the thickness of the smaller mirrors and the "dead zone" where they meet. There was also a region near the dividing line where the picture was "shadowed". This showed up in the sky, especially noticable in the first picture of the fishermen. Of course, if you allow for it when taking the picture, this can be considered a region off-limits for the composition, and cropped out easily later.
Finally I installed new mirrors, and beveled the adjoining mirror edges so the silvered portions touched closely. This was done with a glass workers' beveling machine. With a little patience it could be done with emery paper on a belt or disk bench sander. This reduced the size of the center stripe on the camera sensor. The picture of the Irises was taken with this improved system.
An enclosure would be nice, to keep out dust and bugs. Unwanted reflections are seldom troublesome in this arrangement, though the enclosure should be blackened inside.
Front surface mirrors have fragile reflective coating. Scratches certainly can't be removed, and primarily cause scattering of light, just as a scratch on a lens. Fingerprints left on the reflective surface eventually etch into the metal from the acid in perspiration. A fingerprint can be removed if fresh. Just lay down a piece of Scotch tape on the mirror, then peel it off. This usually lifts the fingerprint off completely. Plastic electrician's tape works also.
The stereo axis separation of this unit is about 3 inches, larger than the typical human eye separation of 2.5 inches. To make it smaller would require smaller inner mirrors and then would necessarily limit the system's horizontal angle of view. If one must do this, mirrors 1.5 inches by 1 inch would be suitable.
Since digital camera sensors are usually a rectangle with sides in ratio 4:3, image splitter attachments produce images in ratio 2:3. If the images are rotated, they end up 1.33 times as wide as high. Actually, since you lose some of the center, where the images join, the resulting pictures can (with optimum mirror adjustment) be something like 1.5 to 1. For this prototype I used an inexpensive 7 megapixel camera, so the usable portion of each picture is about 3 megapixel. These were reduced for display on this web page to about 500 pixels wide, taking up a width of 1000 pixels on the screen.
This document was presented to inspire others to gather up available parts and design their own digital stereo system, with these notes as a starting point and these pictures as proof that it can work. Front surface mirrors are available from many sources. Do not even consider using ordinary mirrors, except for initial testing and alignment. I wouldn't even recommend plastic mirrors, for they are usually not flat, and can warp. However, if you want "fun house mirror" effects, maybe...
If you don't want to build one of these, you can buy one from Lawrence Heyda Studios.
All pictures on this page © 2008 by Donald E. Simanek.
More cross-eyed stereos in 3d Gallery One.
Still more, mostly taken with a digital camera in 3d Gallery Two.
Stereo view cards in 3d Gallery Three.
Home-built digital stereo close-up camera attachment 3d Gallery Four.
Review of the Loreo stereo attachment 3d Gallery Five.
Review of the Loreo macro adapter, 3d Gallery Five B
The Loreo stereo attachment—improved 3d Gallery Five C.
The Loreo LIAC attachment as a 3d macro device, 3d Gallery Five D.
Wildlife photography in your back yard 3d Gallery Six.
Stereo close-up photography in your garden 3d Gallery Eight.
Stereo photography in your aquarium 3d Gallery Nine.
Stereo digital infrared photography 3d Gallery Ten.
Wider angle stereo with the Loreo LIAC 3d Gallery ll. A failed experiment.
Review of the Fuji FinePix Real 3D W1 camera 3d Gallery 12.
Macrophotography with the Fuji 3D camera. 3d Gallery13.
Panoramic stereo photography. 3d Gallery 14.
Tips for stereo photography with the Fuji 3d camera. 3d Gallery 15.
Mirror methods for stereo photography. 3d gallery 16.
The Fuji 3d macro adapter with flash! 3d gallery 17.
Critters in stereo. 3d gallery 18
Wide angle stereo. 3d gallery 19.
Telephoto Stereo. 3d gallery 20.
2D to 3d Conversion. 3d gallery 21.
Stereos from outer space. 3d gallery 22.
Review of the Panasonic Lumix 3d digital camera. 3d gallery 23.
Reverberant flash for shadowless lighting.
Digital stereo photography tricks and effects.
Shifty methods for taking stereo pictures.
Guidelines for Stereo Composition.
![]()
Input and suggestions are welcome at the address shown to the right.
Return to the the 3d and illusions page.
Return to Donald Simanek's front page.
—Donald E. Simanek