Home-Built Macro Stereo Camera.
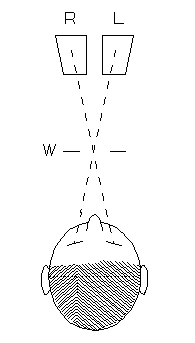
Digital Stereos for Cross-Eyed Viewing.
by Donald E. Simanek.
Stereo photography of small objects is a challenge, and even more so now that film cameras are giving way to digital. In other galleries on this website I have shown examples of such photos made with home-brew modifications of film cameras. But digital cameras have design features that prevent some of those simpler methods.My earlier designs for film cameras had two matched lenses about 3/4 inch apart, recording L and R views on 120 size film, and in a later experiment, on 35mm film. I had a thin black septum between the lenses and the film plane to ensure that the L and R film frames received light only from the appropriate lens. The cameras were fixed focus, with apertures of about f:60. Two electronic flash units gave nearly shadowless lighting and "swamped" all available light. A single press camera shutter was large enough to open both lenses at once. Results were pretty good, as you can see at this link, where you can also see one of the cameras. Could this system be adapted to a digital camera? Not so easily.
- Synchronization of two digital cameras is tricky, for the electrical scans of the sensor arrays must be simultaneous for photographing moving subjects. For that reason I did not consider the two-camera systems.
- I wanted to record the left and right images simultaneously on the sensor of one camera. Digital camera sensors are much smaller than film dimensions. Even digital single lens reflex cameras generally have sensors about 3/4 the linear dimensions of 35mm film frames. This limits the interaxial separation of two stereo lenses to only about 9 mm.
- The mirrors of SLR cameras are in the way, preventing the location of a septum there, unless the mirror is locked up and not used. So another way must be found to keep the two images from overlapping on the camera sensor.
 |
 |
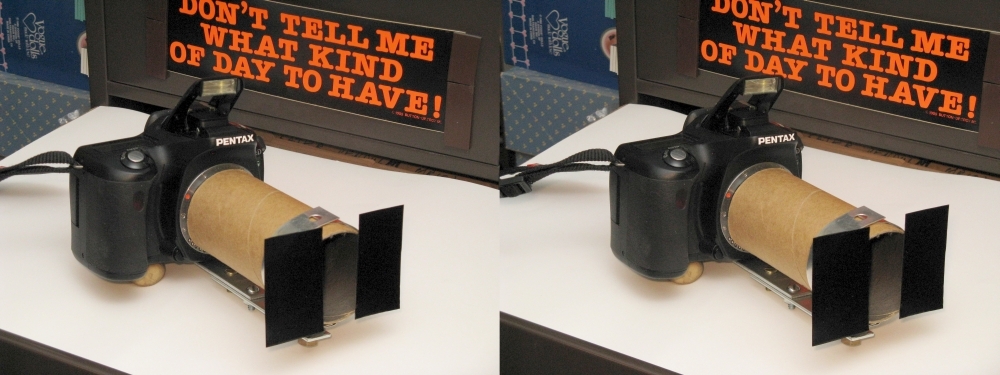
My first experiments used a Pentax 1stDS camera (C). Over the years I've accumulated quite a collection of industrial surplus lenses. There I found two unmounted 50mm focal length achromatic lenses of 9.5 mm diameter, (L). I mounted these side by side 9.5 mm apart at a distance of about 60mm from the sensor, in a short extension tube. Another simple lens of 2.5 diopter was placed in front of them, and two small apertures were located just in front of the 50mm lenses (aperture about f:32).
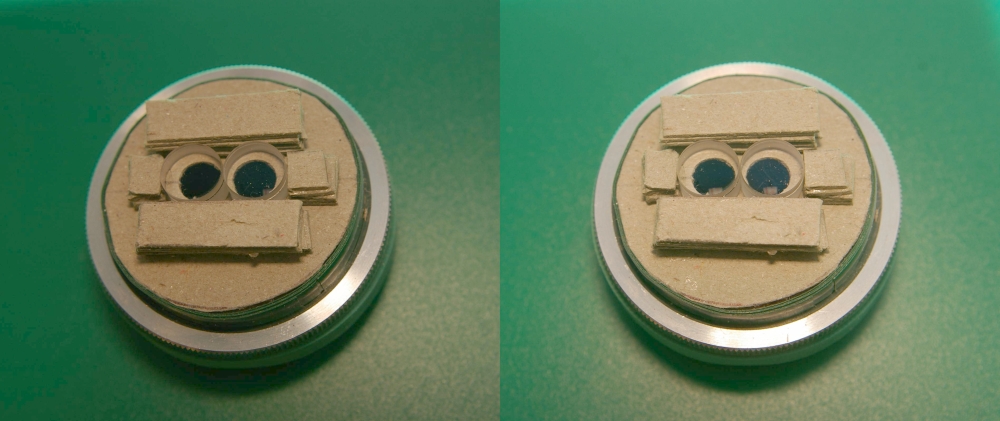
This slide-bar stereo (1/2 inch interaxial) shows the twin lens assembly, held in place with glue and cardboard, on Pentax extension tubes. The mount is 1-3/4 inch diameter. The black paper twin apertures have been removed so you can see the lenses. You needn't send comments on the quality of my workmanship.
The internal septum I used on the film cameras is clearly the best way to keep the images separate on the film, but I wanted to retain the SLR mirror function for composing and focusing, so I adopted this "external septum" system. So far as I can determine, this solution to the problem does not appear in the readily available literature, or on the internet. Its disadvantage is that it requires a blackened tube extending about halfway to the subject of the photo. But telephoto lenses have long tubes, too.
I used a cardboard mailing tube (T) 4.5 inches long, with black masks (M) at the far end, on either side. The subject is 8 inches from the masks, that is, 12 inches from the lenses. The tube was blackened inside with matte paint. The masks define the location of the limits of the edge of each picture at the center of the sensor (S), forming the dividing line between the stereo images. This mask adjustment is very "touchy" so I used refrigerator magnets to hold black thin steel masks cut from old Polaroid film packs. Eventually, when everything is solid and optimized the masks will be more firmly secured.
The lens apertures are spaced 9 mm apart, that is 0.35433 inches. The general rule for stereo is that the nearest object in the scene should be at a distance from the lenses at least 30 times the lens separation, for comfortable viewing. That would be 10.5 inches. This prototype has the subject about 12 inches from the lenses. This isn't bad, considering that everything is constrained by the width of the camera's sensor, which determines the maximum lens spacing.
My experience with film versions of this kind of attachment convinced me that I should use electronic flash, to "swamp" any available light and ensure that I could photograph moving subjects, like bees and butterflies. For these first experiments I simply used the camera's pop-up flash, which is bright enough for this aperture size. Later, when I use smaller apertures I intend to use one or two stronger flash units and lower ISO settings.
[Feb 20, 2008] Here's an early example of what we are up against. This has not been cropped or retouched. The field of view is only about 4 cm wide. (The spherical ball is only 9 mm in diameter.) The on-camera flash was bounced from a low white ceiling. The taller-than-wide format is seldom attractive in stereo. But we can set the camera at high resolution, and frame with the intention of cropping off the top and bottom of the pictures, a very easy operation. Still, it was this picture that convinced me that this design was worth the trouble of refining. The final version will have smaller apertures and stronger flash, for greater depth of focus.

[March 3, 2008] The first spring flowers bloomed in the sunshine here in Pennsylvania, so, tired of testing the device on small objects on my cluttered work desk, I took the camera outdoors to photograph Spring Aconites in Connie's garden. Here's the results.
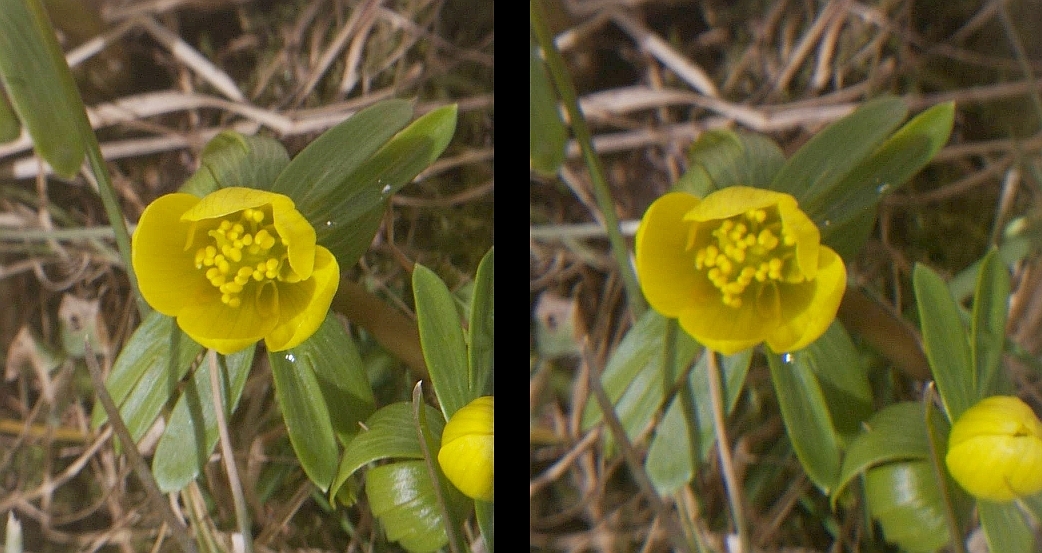
These are very small flowers, the blooms about 1 cm wide. You can't tell that from just looking at the stereos, for you see only relative, not absolute, depth.
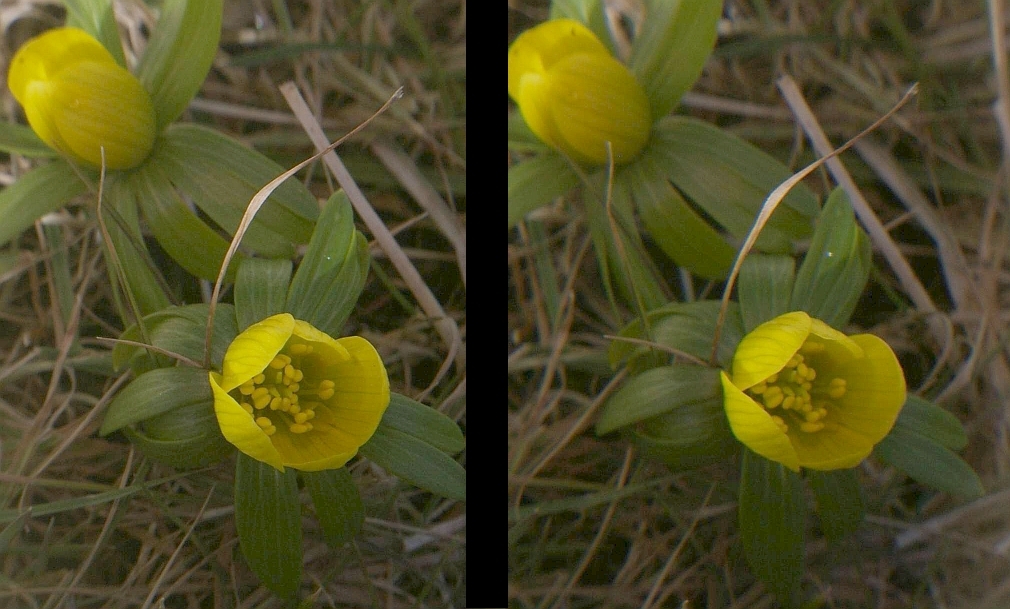
This stereo attachment is still a mock-up, held together by glue, rubber bands and tape. It must be held carefully, lest it fall apart into pieces while you are taking the picture. I made use of the free software, Stereo Photo Maker to tweak the alignment of the pictures.
Perceptive viewers will notice that the two pictures aren't in identical focus. One lens has slipped a bit in its cardboard mount. However this is of little concern, for the brain fuses the two pictures and doesn't notice the difference in sharpness. Indeed, some cameras have used this psychological effect deliberately and have two stereo lenses focused a bit differently to give an illusion of greater depth of field in a fixed focus stereo camera. Some people who get replacement lenses in their eyes choose to have them of different diopter rating for the same reason.
The combination of two stereo lenses and and a single converging lens is generally considered unacceptable, for it produces some keystone effect, and worse, the effect is opposite in the L and R picture. But that is small, and only affects objects near the edges of the frame. I doubt anyone noticed in these samples. I only used it in these early designs because I do not yet have two matched achromats of the desired focal length (35 or 40 mm). But part of my philosophy of tinkering is that it is fun to see how much one can "get away with" when deviating from strict theory.
The keystoning problem isn't as simple as it seems. The Victorian era view cards had centers spaced 3 inches apart, so the stereoscope had prismatic lenses to make them viewable without diverging one's eyes (which most people simply cannot do). But those lenses introduced keystoning. Whenever you free-view by the cross-eyed method, you introduce keystoning in the viewing process. Yet the brain can adapt to this. And any method that presents the eyes with a view that does not match the angle of view of the camera introduces depth distortion. Almost all the technology of stereo photography is a balancing of compromises. Mathematical purists do not get very far in this game of illusion.
[March 6, 2008] I remounted the lenses more solidly, moved them closer to the sensor, and removed the 2.5 diopter lens. The lenses are now 9.5 mm apart (that's as close as they can go). In front of them I put 1/8 inch diameter apertures spaced 1 cm apart. Those apertures are about f:16. This spacing puts the apertures a bit toward the outer edges of the lenses, for a slight convergence of stereo axes. With luck, a wasp had found the flowers.

This picture has been severely cropped (the top and bottom were uninteresting, and I like a horizontal format better anyway). Normally I feel the narrow angle of view in stereo is limiting, but for small objects it may be just fine. How small could it be and still have decent stereo? I experimented by cropping this picture even more drastically, so that only the wasp is left.

This is still reduced by about half size so the stereo pair would fit the screen. So it is nowhere near the full resolution that was recorded by the camera. The following picture indicates the maximum resolution. Probably a 6 megapixels camera setting is overkill for a web page.

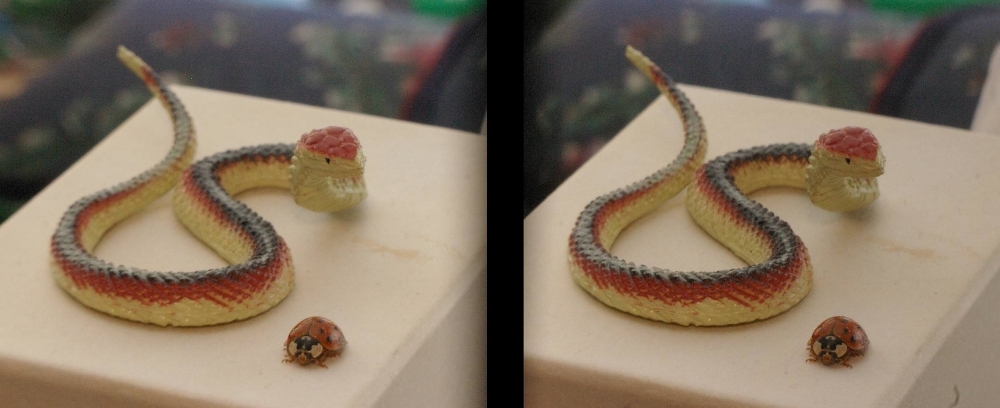
This time of year ladybugs find their way into my work room. This one was crawling around the junk on my desk and happened near a small plastic snake. I couldn't resist recording the chance juxtaposition.
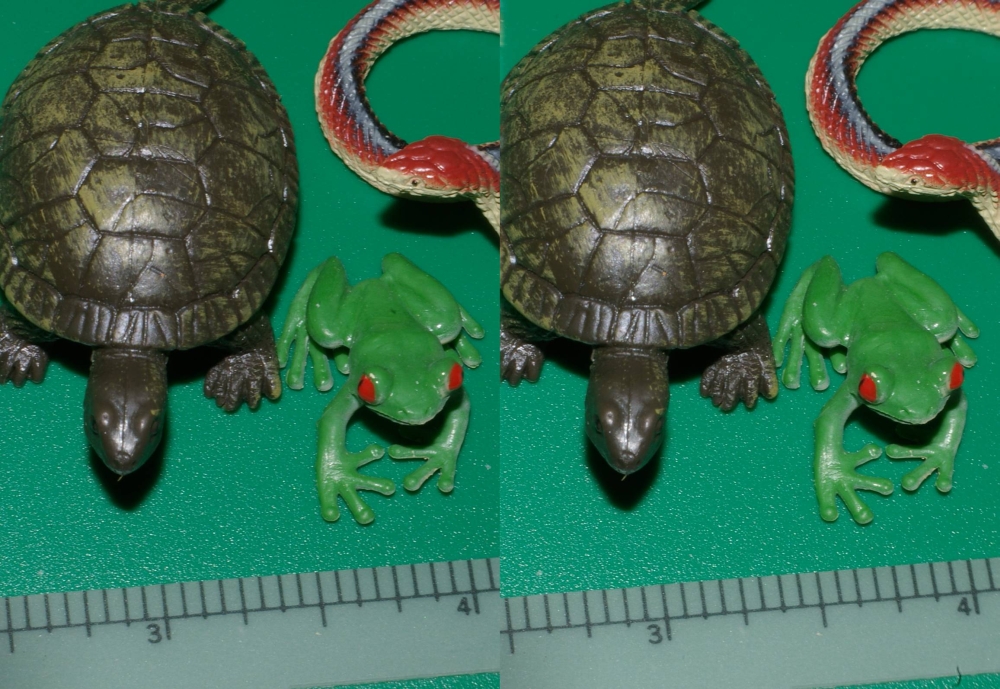
[March 14, 2008] The system has been ruggedized, and the apertures made smaller, about f:45 for greater depth of field. Here's a test with the plastic critters on my work table. The ruler shows inches.
[March 15, 2008] A sunny day, more flowers are blooming, and the live critters have found them. This picture is just as the camera saw it, no cropping or other manipulation except to swap the left and right pictures so they can be viewed cross-eyed.
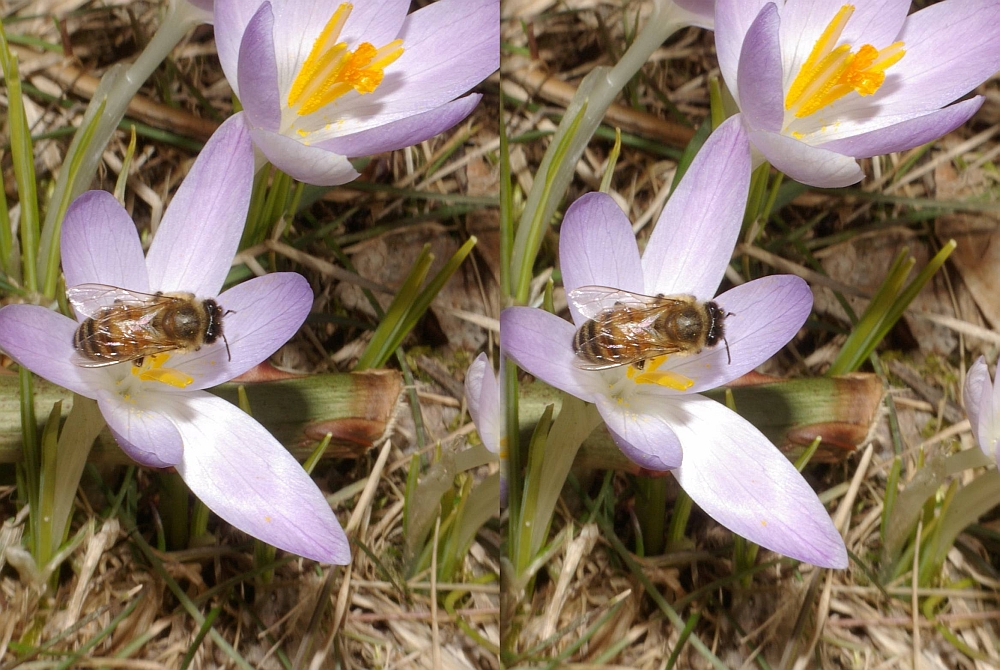
It's good to see that there are still honeybees around here.

The lenses on this adapter are good enough that a picture such as the previous one can survive cropping and still show good resolution.

For comparison, this picture was taken without flash, just natural sunlight, and the camera was hand-held. With ISO 400, even at this small aperture of f:45, flash isn't necessary, and I think natural lighting gives more natural texture, modeling and color to the petals. Flash on camera gives head-on "flat" lighting. I had designed earlier close-up cameras with the assumption that flash would always be used, and the camera hand-held. With flash, the quick motion of insects wouldn't matter, nor would the motion of leaves and petals in the breeze. And there's the large advantage that a tripod isn't necessary with flash. Insects don't sit still for pictures, so you have to follow them.
I prefer non-intervention in photos. The dry leaves were not "arranged", but were left exactly where they were. Of course aiming and framing are choices the photographer makes, so no photo can claim to be totally "natural".
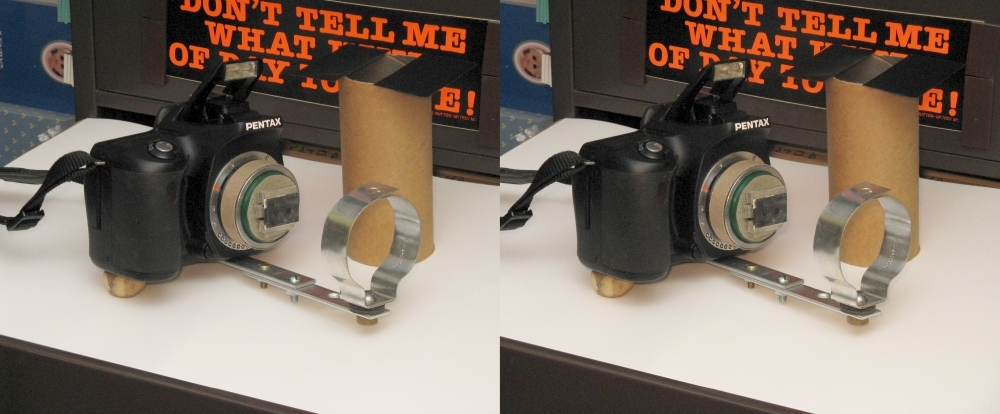
[March 17, 2008] So here's the current status of the project. I borrowed a digital camera and made two slide-bar 3d pictures of the Bugshooter III. One shows the cardboard masking tube removed so you can see the two lenses.

These crocus were taken at ISO 400 in sunlight without flash, hand-held. In direct sunlight, ISO 800, the shutter automatically adjusts to about 1/100 second, just fast enough for hand-held shots.
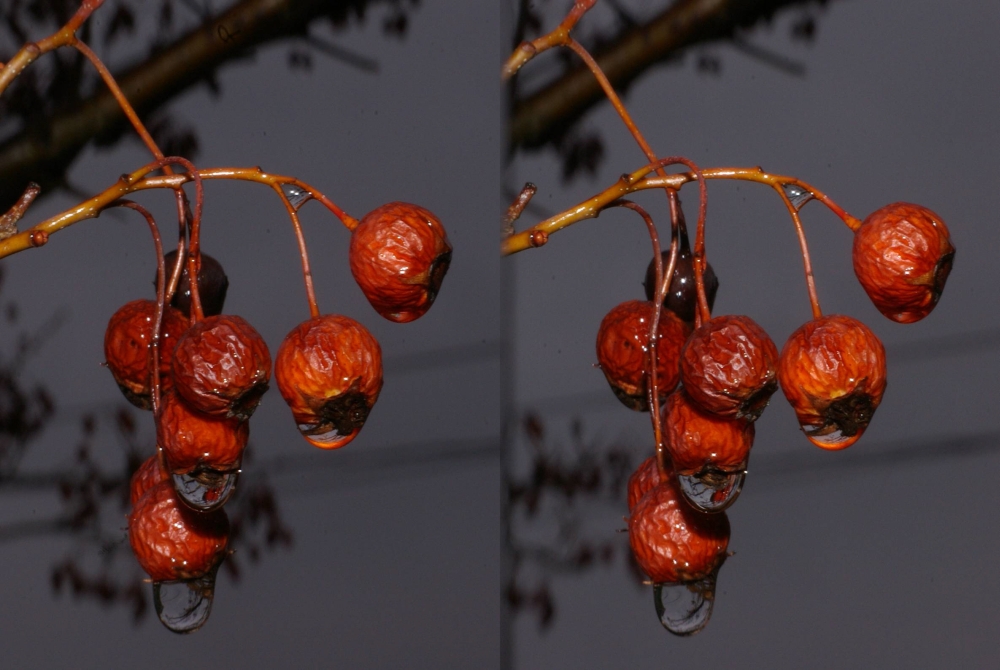
[March 19, 2008] It's a rainy day, a good time to take pictures with water droplets. These are berries on a Hawthorne tree. Direct flash was used from the camera's pop up flash.
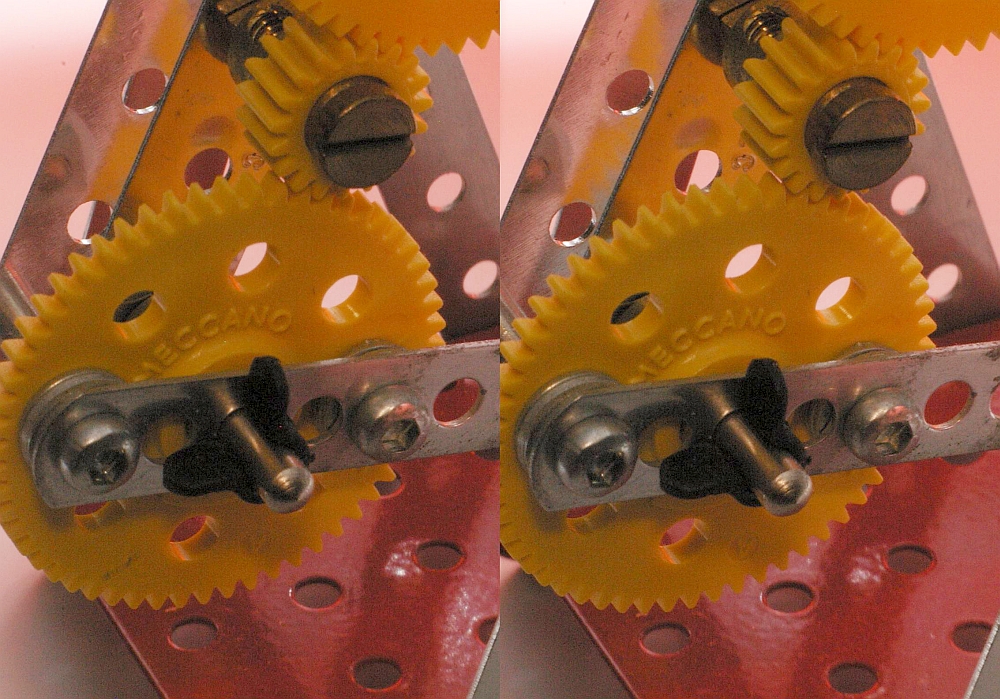
[March 20, 2008] Too cold today for flowers or insects. This Meccano model made a good subject, though.
A note on the lens apertures. I use a 1/8 inch round ticket punch to punch two holes in two layers of thin paper. Then I displace the holes sidewise so that the aperture is smaller and in the shape of a cat's eye pupil: () That is about twice as high as it is wide. This emphasizes horizontal resolution (and stereo resolution) over vertical resolution. It is also very easy to make.
The lenses are 9.5 mm diameter, mounted so their edges touch, so their centers are 9.5 mm apart. The apertures are spaced a bit outside the lens centers, 10 mm apart, to give a slight "toe-in" of their chief rays. This shifts the stereo "window" to a nearer distance, making full use of the limited angular field.
All of these pictures are hand-held, using the camera's pop-up flash. That's certainly convenient, but is not the ideal lighting for artistic effect. I approach this kind of project by solving just one problem at a time, and artistic lighting was farther down my "to do" list. For a solution to this problem, see 3d Gallery Five C and the note at the bottom of 3d Gallery Six.
A correspondent inquired whether this optical system has geometric distortion. So I did a test with a sheet of graph paper, in sunlight, again with the camera hand-held. There's no significant keystone distortion or curvature of field that I can see.
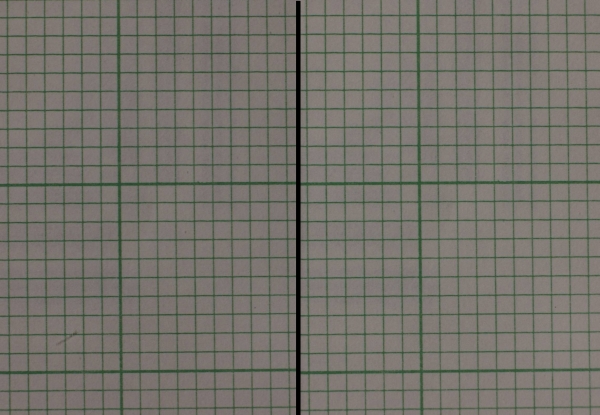
However, close examination of of the other pictures reveals that there's depth compression, similar to that in 2D pictures taken with telephoto lenses. This is not readily obvious in nature pictures, and reduced depth may even be considered a pleasanter rendering of the subject. It is more apparent with photos of objects of known geometric shape, such as the Meccano model with gears.
I hope this page might inspire some reader to attempt such a project, and improve upon it. I have not given detailed dimensions, or explicit step-by-step instructions, for the device you build should be tailored to your needs, and will certainly depend on the make and type of camera you have, and the particular focal length lenses you may be able to obtain. Expect a few wrong turns along the way, but take from this document the message that this can be done, with quite acceptable results, modest cost and a small investment of time.
The next version of this will have 40mm focal length lenses, about the shortest off-the-shelf lenses that could be used with standard SLR cameras.
Low cost T-mount adapters can be obtained from The Surplus Shed, for Canon, Pentax, Minolta and Nikon bayonet mount cameras. Other web sources have them at twice the price. But your local camera store may still have old stock items they'd sell you at a low price.
Surplus Shed has 40mm achromats, 9mm diameter, mounted. They are air spaced two element acrhomats, 11.5 mm diameter. I have successfully used a bench grinder to pare down one edge of each (metal sleeve and lens) so they can be mounted with center spacing about 10 mm apart. After grinding, they must be disassembled and the elements cleaned of debris. They are a little tricky to remove from their metal sleeves, which are 13.5 mm diameter. Order extras if you intend to do this. If you have one of the SLR cameras with larger sensor size, or are using a film SLR, you won't need to resort to such surgery on the lenses.
I'm also considering buying a classy black anodized metal commercial extension tube, which may be the most expensive part. Metal T-mount extension tubes up to 10 cm (3.937 inches) long and 48mm (1.89 inches) diameter are available at Edmund Industrial Optics. After you see the price, you may decide to stick with a blackened cardboard tube instead. This is another source for lenses.
All pictures on this page © 2008 by Donald E. Simanek.
More cross-eyed stereos in 3d Gallery One.
Reverberant flash for shadowless lighting.
Input and suggestions are welcome at the address shown to the right.
Return to the the 3d and illusions page.
—Donald E. Simanek
Still more, mostly taken with a digital camera in 3d Gallery Two.
Stereo view cards in 3d Gallery Three.
Review of the Loreo stereo attachment 3d Gallery Five.
Review of the Loreo macro adapter, 3d Gallery Five B
The Loreo stereo attachment—improved 3d Gallery Five C.
The Loreo LIAC attachment as a 3d macro device, 3d Gallery Five D.
Wildlife photography in your back yard 3d Gallery Six.
A home-built digital stereo camera using mirrors 3d Gallery Seven.
Stereo close-up photography in your garden 3d Gallery Eight.
Stereo photography in your aquarium 3d Gallery Nine.
Stereo digital infrared photography 3d Gallery Ten.
Wider angle stereo with the Loreo LIAC 3d Gallery ll. A failed experiment.
Review of the Fuji FinePix Real 3D W1 camera 3d Gallery 12.
Macrophotography with the Fuji 3D camera. 3d Gallery13.
Panoramic stereo photography. 3d Gallery 14.
Tips for stereo photography with the Fuji 3d camera. 3d Gallery 15.
Mirror methods for stereo photography. 3d gallery 16.
The Fuji 3d macro adapter with flash! 3d gallery 17.
Critters in stereo. 3d gallery 18
Wide angle stereo. 3d gallery 19.
Telephoto Stereo. 3d gallery 20.
2D to 3d Conversion. 3d gallery 21.
Stereos from outer space. 3d gallery 22.
Review of the Panasonic Lumix 3d digital camera. 3d gallery 23.
Digital stereo photography tricks and effects.
Shifty methods for taking stereo pictures.
Guidelines for Stereo Composition.
![]()
Return to Donald Simanek's front page.