Stereo Pictures for Cross-Eyed Viewing.
These galleries document and illustrate various ways to take stereo pictures with film and digital cameras, using home-built adapters. Most of these methods require no special construction skills and very small expense.This page requires a monitor width of at least 1000 pixels in order to see both images for cross-eyed stereo viewing. Since the photos also have large vertical dimension, it helps to toggle the "full screen" view (F11 in Windows). However, if you haven't mastered that viewing method, these pictures may also be appreciated as 2d flat photos. All are © 2008 by Donald Simanek.
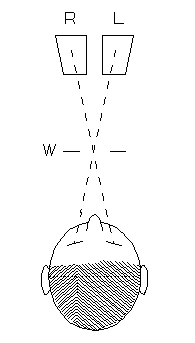
For instructions on free-viewing 3d by the cross eyed method, see the How to View 3D page.
These galleries presume some prior knowledge of stereo photography. Those new to this form of photography can get a painless tutorial at Life & Depth: An Introduction to Stereo Photography.
Panoramic 2D methods
In the quest for greater photo realism, one challenge is to record a wide angle of view. The human eyes have nearly a 180° horizontal field of view, but binocular vision only covers about 140° since the fields of the two eyes don't fully overlap. Cameras and lenses have been designed to do better than the "normal" 50mm lens of a 35mm film camera which has a horizontal angle of view of 40°.
- Wideangle and bug-eye lenses for standard cameras.
- Cameras designed with wide film aperture, the film often configured on a cylinder. Special lenses must be designed to work with that cylinder.
- Cameras with wide film aperture, wrapped on a cylinder, with a moving lens and shutter to sweep an image across the film.
- Using an ordinary camera, photographing the scene in several overlapping panels that are later stitched together. Software is available to accomplish this with digital photos, warping the perspective to ensure "seamless" appearance where the panels join.
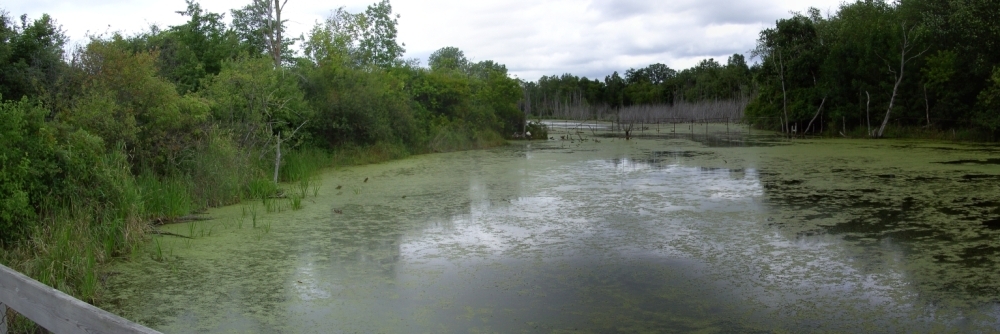
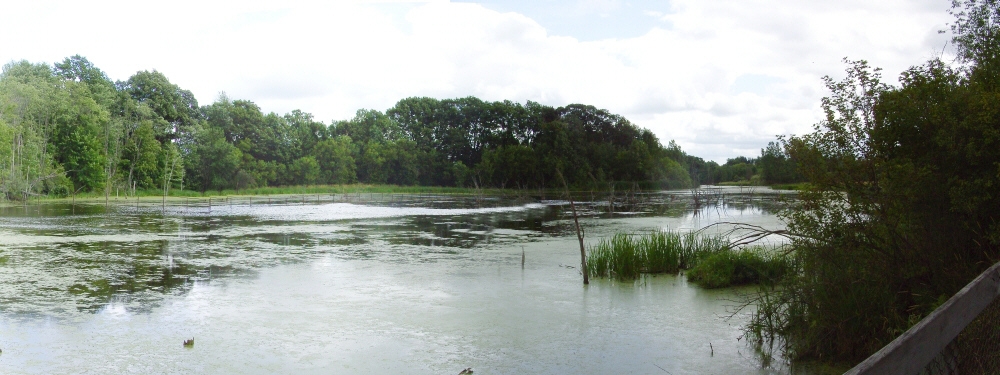
This wetland is at the Meijer Gardens in Grand Rapids, Michigan. The original panoramic was made up of ten photographs spanning 180°. I have split it into two parts here. Notice how the software (PanaVue) has warped the perspective to cylindrical, so the wooden railing (which was straight) appears curved.
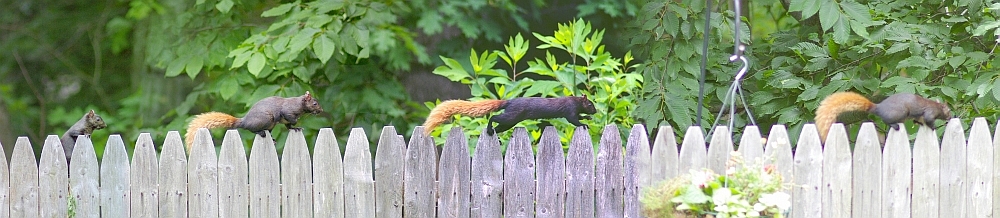
The same software can be used for other purposes. This photo was made up of four telephoto pictures of one mellanistic squirrel running across a picket fence.
Such photos stitch most successfully if the camera is rotated about a fixed axis, preferably one passing through the rear nodal point of the camera lens. This ensures that there's no stereo displacement at the seams. However, if there are no nearby objects at the joint, you can get away with hand-holding the camera and letting the software correct small errors.
Stereo panoramics?
If you know the geometry of stereo and of panoramic photography, you realize that it would be nearly impossible to get perfect results. So you might not even try. If you look at a landscape and turn your head to sweep your eyes across it, you are constantly shifting your stereo baseline. So if you did this with a stereo camera, the panels of the panoramic wouldn't join properly, especialy if there are objects of different distances at the join line. But you can avoid that by choosing join lines were there aren't such problems.Another problem is viewing the result. Unless you have a Cinerama movie screen handy, you can't present the picture to subtend the same angle as the original scene. On this web page, the results are necessarily miniatures of the original scene. The best we can expect is to reproduce the scene with a suggestion of depth differences.
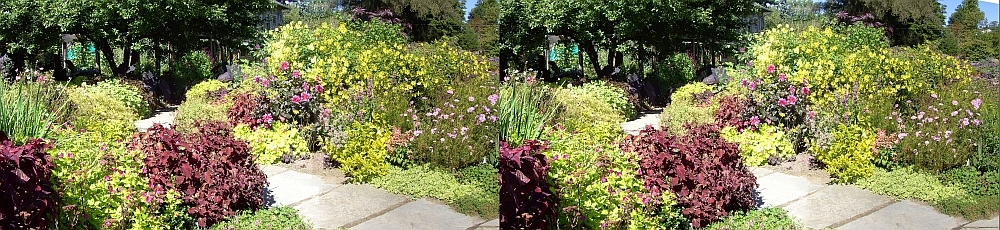
This picture of a garden at the Cornell Plantations was my first attempt, using a 2d camera and the cha-cha method combined with shifting the camera to photograph two panels. Four pictures were taken. The camera's auto-exposure exposed the two scenes a bit differently, and that shows where they join, but the result isn't a total failure. With a little tinkering with gamma it could be fixed.
This task has been made easier with the Fuji 3D W1 camera. While it has built in features for facilitating panoramic shooting in 2D, they don't function in the 3D mode. No matter, one can still use the classic method of remembering where the edge of the first picture was, and being sure the next one overlaps it somewhat. They you can use StereoPhotoMaker (SPM) to view the stereo pictures, then use its "save left and right picture" option. It saves them and labels them with _l and _r suffixes. Then with Panavue, stitch the first panel left picture to the second panel left picture. Do the same for the right pictures. Then load the two resulting pictures into SPM, and let it do its auto-adjust. Then crop the stereo as you wish and save it. It's a good idea to let PanaVue sense the effective focal length of the lens you used, and if there's a discontinuity where the panels join, manually choose different focal lengths till it looks good. Use the same focal length value for both pictures. PanaVue's auto align doesn't always get it right, so you may have to choose manual stitch points. Try to use points at picture features at the same distance, and be sure you use the same ones for both left and right images.
Here's one of the first panoramics I took this way with the Fuji 3D camera. It is the covered bridge at Forksville, PA.
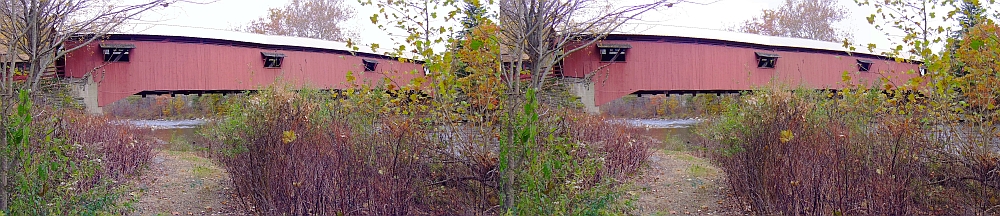
This image is about 1/10 the linear size of the original. One can print pictures taken this way on two pieces of 8.5 x 11 photo paper. Fasten them together in R/L order, and free-view them cross eyed at a distance of 4 to 6 feet. The results are stunning. Salvadore Dali made stereo paintings this way, very large, to be mounted on a museum wall for viewing cross-eyed. I'm told they are in the Dali Museum in Spain.
In both cases it would have been difficult to photograph the scene without taking two panels separately. In the garden, to move farther back from the subject would have required stepping into a flower bed or encountering a stone wall. The covered bridge picture would have required one to put on waders and move farther down the creek.
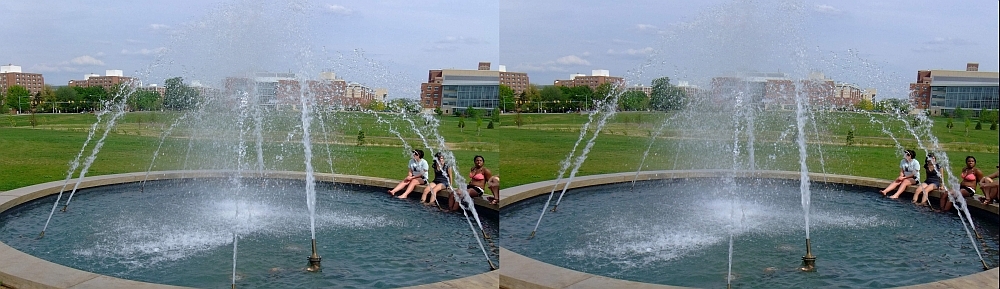
Here's another difficult situation. The fountain is at the Penn State University Arboretum. I wanted a picture of it with campus buildings in the background. But a high stone wall prevented me moving back farther away, and even with the wide angle setting of the Fuji 3d camera the whole thing wouldn't fit in the frame. So I shot two stereo pictures. This shows the power of Stereo Photo Maker and Panavue software used in combination. Unfortunately the stitched result was slightly tilted (which is more obvious in a panoramic) and had considerable barrel distortion. But another run through SPM allowed both to be considerably corrected. Normally one wants to avoid anything moving where the panels join, so I waited until the girls were all on one side. But the water jets were at the join of the two panels. Panavues "blending" function made that barely noticable.

This Rhododendron garden in Sunbury, Pa. was photographed in two panels with the Fuji 3d camera.
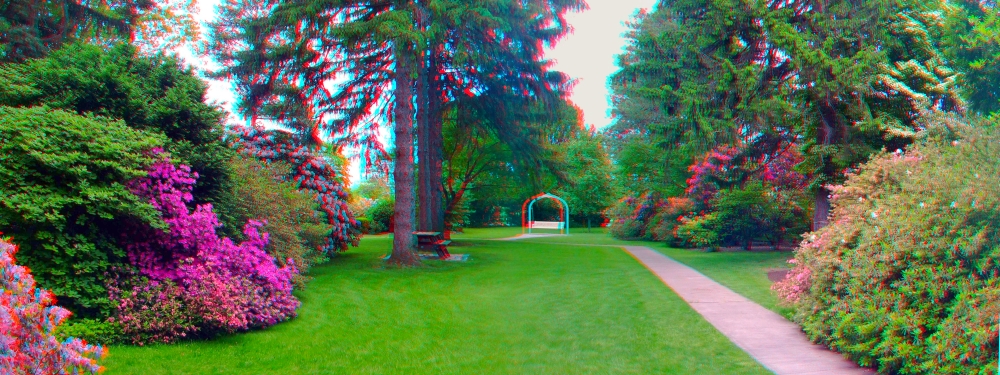
I detest anaglyph stereo viewing, but panoramics may be an exception. This one is red-cyan, created with StereoPhotomaker. You gain a feeling of the larger angle of view, and lose color fidelity and have to put up with ghost images (as with the white lawn chair in the center). Try it if you have red/cyan or even red/blue glasses.
Oct 2009, May 2010.
More cross-eyed stereos in 3d gallery Two.
Antique stereo view cards in 3d Gallery Three.
Building a digital stereo close-up photography system in 3d Gallery Four.
Review of the Loreo stereo attachment 3d Gallery Five.
Review of the Loreo macro adapter, 3d Gallery Five B
The Loreo stereo attachment—improved 3d Gallery Five C.
The Loreo LIAC attachment as a 3d macro device, 3d Gallery Five D.
Wildlife photography in your backyard, 3d Gallery Six.
A home-built digital stereo camera using mirrors 3d Gallery Seven.
Stereo close-up photography in your garden 3d Gallery Eight.
Stereo photography in your aquarium 3d Gallery Nine.
Stereo digital infrared photography 3d Gallery Ten.
Wider angle stereo with the Loreo LIAC 3d Gallery ll. A failed experiment.
Review of the Fuji FinePix Real 3D W1 camera 3d Gallery 12.
Macrophotography with the Fuji 3D camera. 3d Gallery13.
Tips for stereo photography with the Fuji 3d camera. 3d Gallery 15.
Mirror methods for stereo photography. 3d gallery 16.
The Fuji 3d macro adapter with flash! 3d gallery 17.
Critters in stereo. 3d gallery 18
Wide angle stereo. 3d gallery 19.
Telephoto Stereo. 3d gallery 20.
2D to 3d Conversion. 3d gallery 21.
Stereos from outer space. 3d gallery 22.
Review of the Panasonic Lumix 3d digital camera. 3d gallery 23.
Reverberant flash for shadowless lighting.
Digital stereo photography tricks and effects.
Shifty methods for taking stereo pictures.
Guidelines for Stereo Composition.