The Loreo 3d Macro Lens in a Cap.
Reviewed by Donald E. Simanek.
The Loreo company has had a long history producing products for stereo photography. Their 3d Lens in a Cap provided a convenient way to adapt interchangeable lens cameras to stereo. A modified version of this worked with 3/4 size digital camera sensors, common on digital SLR cameras. An improved version of this has been announced for this year, but has not been shipped yet.Those beam-splitter adapters used mirrors to flip the pictures left/right so that the final picture had the images in order left to right. Therefore prints made directly from the pictures could be made by photofinishers and viewed with stereoscopic viewers. The user had no processing or mounting hassles.
The Loreo adapters were useful for subjects 3 feet to infinity. This left the "inches to feet" range off limits: small animals, flowers, miniature models. Loreo released another adapter last year, specifically designed to fill this gap, continuing their philosophy of arranging the mirrors to produce pictures in order left to right. It can focus from 9 inches to 32 inches.
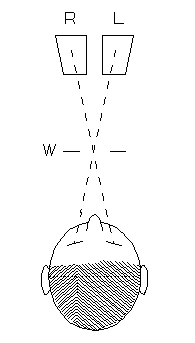
The stereo pictures below are presented for cross-eye free viewing. You should have a display screen at least 1000 pixels wide. The cross-eyed viewing method takes some people a while to learn, but is worth the effort, for stereo pairs may be presented on the page (or screen) much larger than with other free-viewing methods. To learn how to do this, see How to View 3d. At first, it helps to move your head farther from the screen until you can reliably fuse the two pictures, then move closer, slowly.
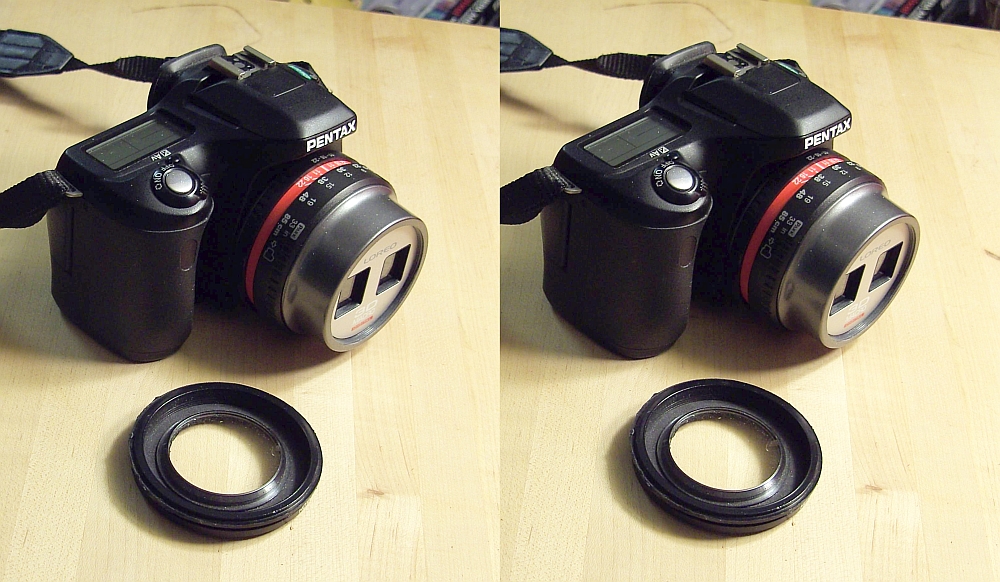 |
| The Loreo 3d Macro Lens in a Cap mounted on a Pentax 1stDS digital SLR. A supplementary close up lens lies on the table. |
|---|
[December 2008] This new Loreo Lens in a Cap macro lens finally arrived, after several production delays. On first look, it has attractive design, and appears to be another marvel of plastic engineering. Is it more than a toy? I intend to find out.
Some nice features include a continuous focus control from 9 inches to 32 inches, with depth of field indicator for the three aperture settings, f:22, f:16 and f:11. This is very familiar to those of use who learned photography with all-manual settings. Like the other Loreo attachments, the camera's autofocus does not function with this passive device, but auto-exposure and TTL flash exposure do. It is best to set the camera for aperture priority.
The Loreo comes in four models, for Canon, Nikon, Pentax or Minolta cameras. They attach easily, firmly and securly to the camera just as any interchangable lens would. The focus and aperture controls operate smoothly, though they have a "plasticy" feel, since this device is all plastic, except for the few screws holding the parts together. But it is sturdily built. The lens is a plastic polymer composite.
Note: all the pictures below were taken by me, using a Pentax 1stDS SLR camera. I did no alteration of color, brightness, gamma, or contrast, and did not digitally sharpen them.
 |
 | |
| Vertical misalignment. | The black band down the middle. Well, not exactly in the middle. This is the picture as the camera sensor recorded it. Notice the extent of the vignetting on either side of the dividing line. |
|---|
The first shots I took reveal another common flaw of the Loreo devices. The vertical alignment of the left and right pictures isn't perfect. One picture is noticably higher than the other. There is no way for the user to correct this mechanically, for the bayonet mount aligns the lenses in only one orientation. (Some buyers may be lucky and get one that is perfect.) Now I can live with this, since I intend to run every picture through StereoPhotoMaker (SPM) software, flipping the pictures left and right, and cropping. So correcting the vertical afterward isn't a big deal. SPM automatically corrects that. But someone who expects the pictures to be immediately viewable without any correction may find this intolerable. Loreo marketing is aimed at the snapshooter who wants minimum fussing with results. These users will take the pictures to a one-hour-photo shop to have prints made for viewing with one of the Loreo viewers. Therefore Loreo should ensure that the results are perfect under these conditions.
StereoPhotoMaker's "auto align" function also reports that the pictures have a slight relative rotation, which SPM automatically corrects nicely. I've tested SPM on sample pictures at Loreo's web site and find the same thing. It's only a fraction of a degree, and may be within the manufacturing tolerances.
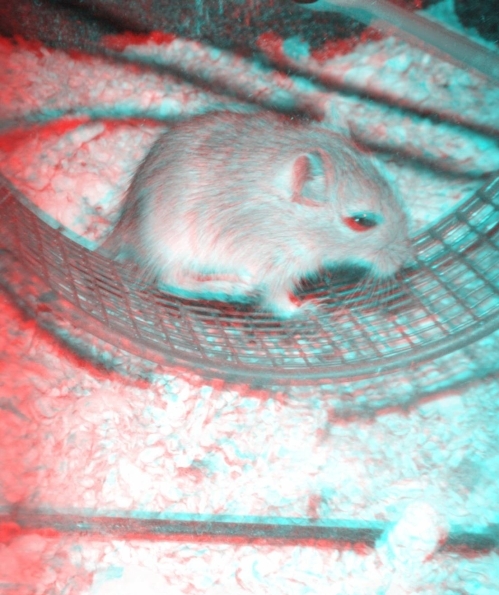
The anaglyph picture of the mouse at the left shows the uncorrected vertical mismatch. This clearly shows in the double red/cyan images of the sticks at the bottom and top, and the mouse's eye.
The other unfortunate feature of all of beamsplitter devices is the center black band between the two images. It isn't perfectly centered on the camera sensor, so it intrudes into one of the pictures. It also causes vignetting on one picture or both. Again, this can be cropped off, if you allow for it when composing the picture. I can live with that, too. I understand the engineering considerations that make this unavoidable in a compact device selling at this low price ($120).
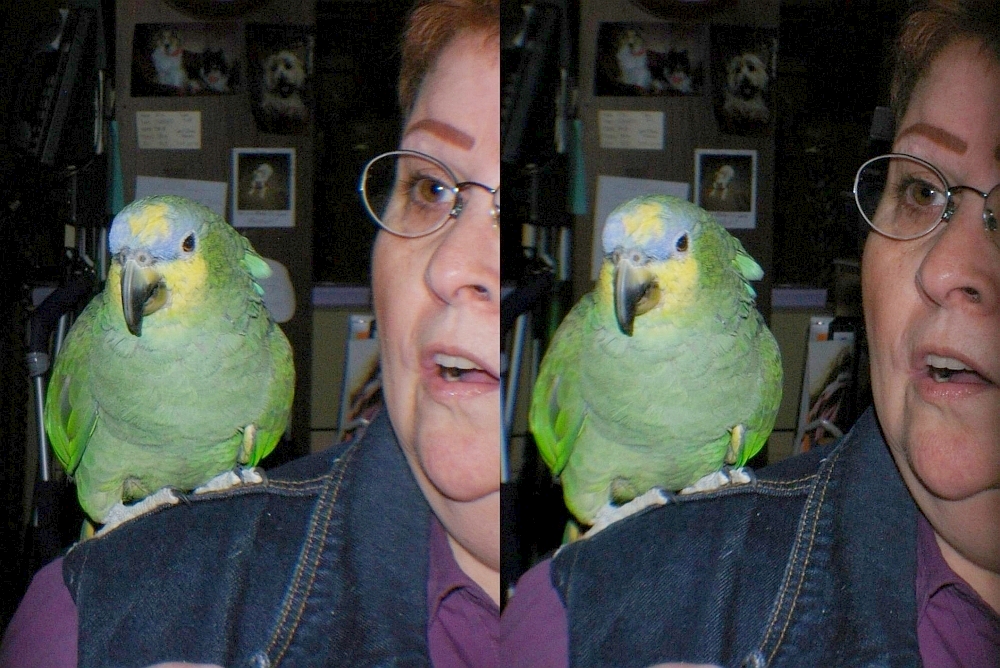
In this picture of a parrot, notice that the woman's face is darker in the left eye picture (which is on the right of this R/L pair). This is due to the centerline shadow, which in this case could not be easily cropped. [Picture taken at Calico Creek Feed and Pet.]
The effective stereo base (interaxial) of this device is 2 cm (about 0.8 inch), and the axes do seem to be close to parallel (as they should be, to avoid keystone effect). The parrot picture shows very distant objects on the store wall in the background, and they do not show excessive divergence as they would if the stereo axes converged.
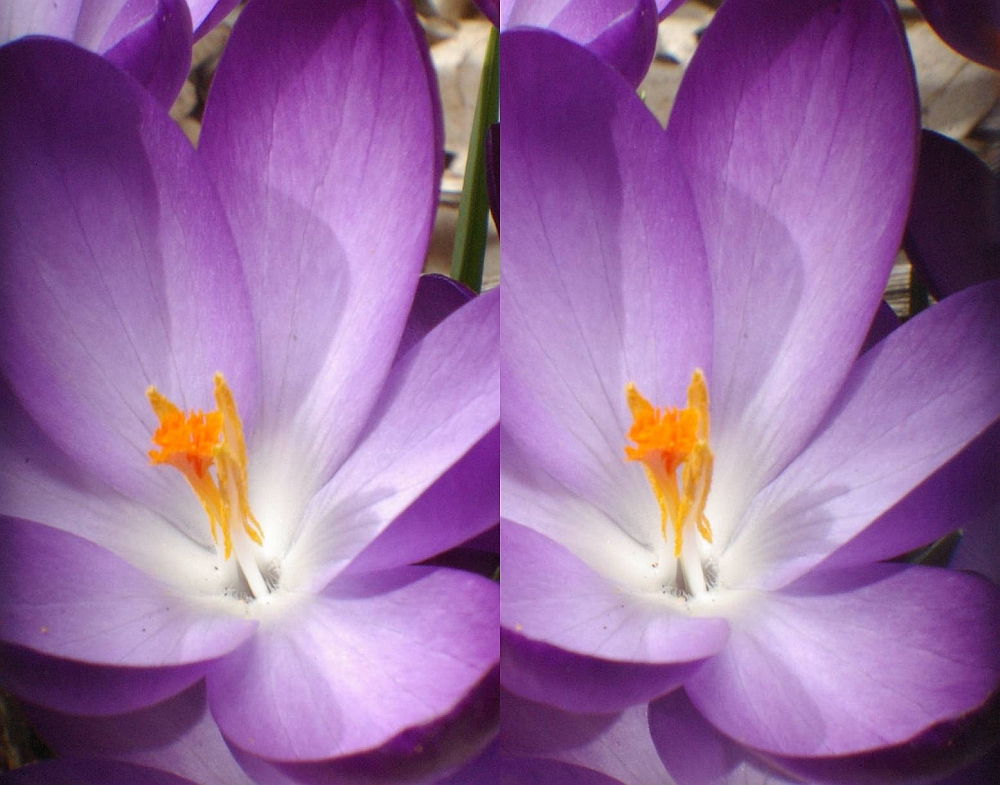
According to the 1/30 rule, the minimum working distance should be 24 inches for good stereo depth that can be comfortably viewed. This lens can focus much closer, down to 9 inches and even closer with supplementary lenses. Such close distances give somewhat exaggerated, and possibly unrealistic depth (depending on the subject photographed).
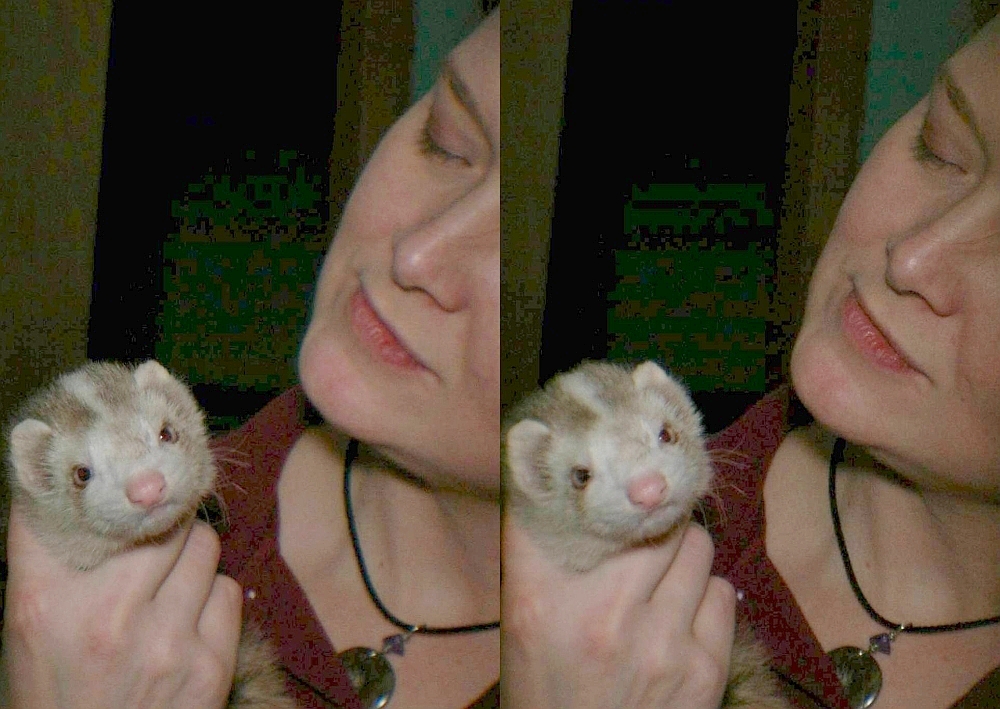
This picture of Shelli and the Ferret was taken at about 32 inches with diffuse flash. [Picture taken at Pugsly's Pets.] Ferrets do a lot of squirming, and don't "sit still" for photos. Unfortunately this is a bit underexposed. While autoexposre works reliably with this adapter on my Pentax 1stDS camera, the TTL flash gives variable results (over or under exposure) when using the camera's popup flash. This requires compensation by resetting the ISO of the camera, and the ideal ISO setting depends on the distance of the subject. This requires a lot of fiddling to get optimum exposure for each subject. For very close subjects, a flash diffuser helps, or a flash reflector to bounce light off the ceiling.
While I am nit-picking, I note that most digital SLR cameras have a protruding housing for the popup flash. This gets in the way of reading the Loreo's aperture and focus settings. Now if these had been located either to the right or left of top center, they would have been easier to use.
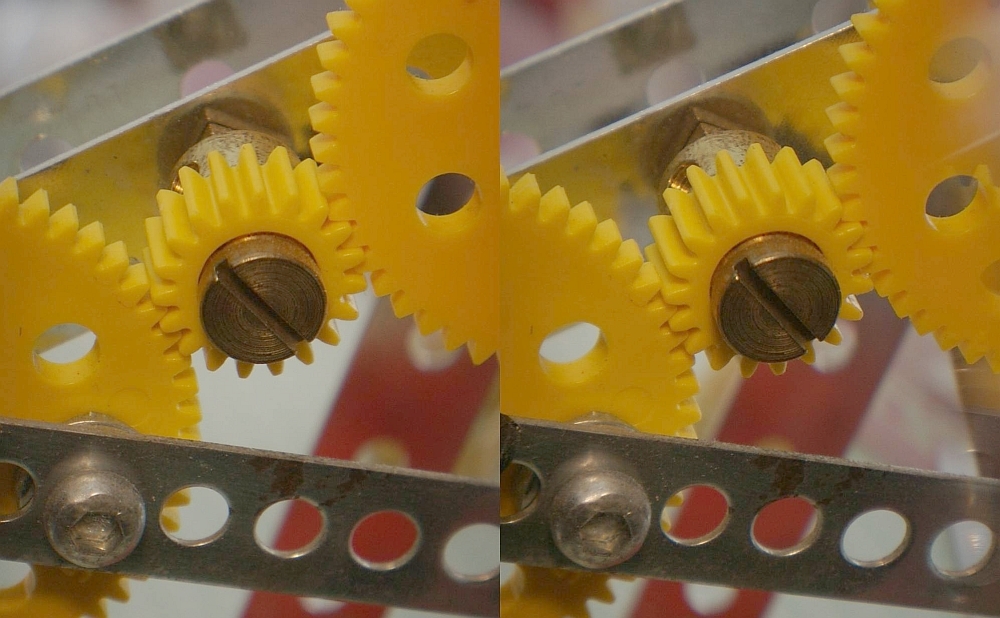
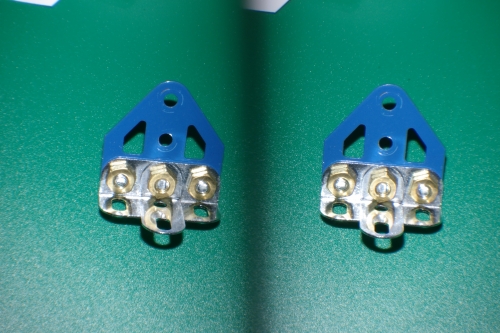
A useful feature is the 52mm threads on the front of the Loreo, allowing you to attach lightweight filters or close up lenses. Filters? How often do you use them with a digital camera? Closeup lenses, maybe. I tested that, and it works, though you have to crop the width of the images a bit more. The picture above was taken with an additional 5 diopter close-up lens, about 8 inches from the subject. The Meccano construction set strip has holes spaced 1/4 inch apart. The small yellow gear had a diamter of 1/2 inch. Diffuse flash was bounced from a low ceiling for this picture. This particular close-up lens achieves a focusing range from 5 to 8 inches, and the results are surprisingly good. in spite of violating the 1/30 rule.
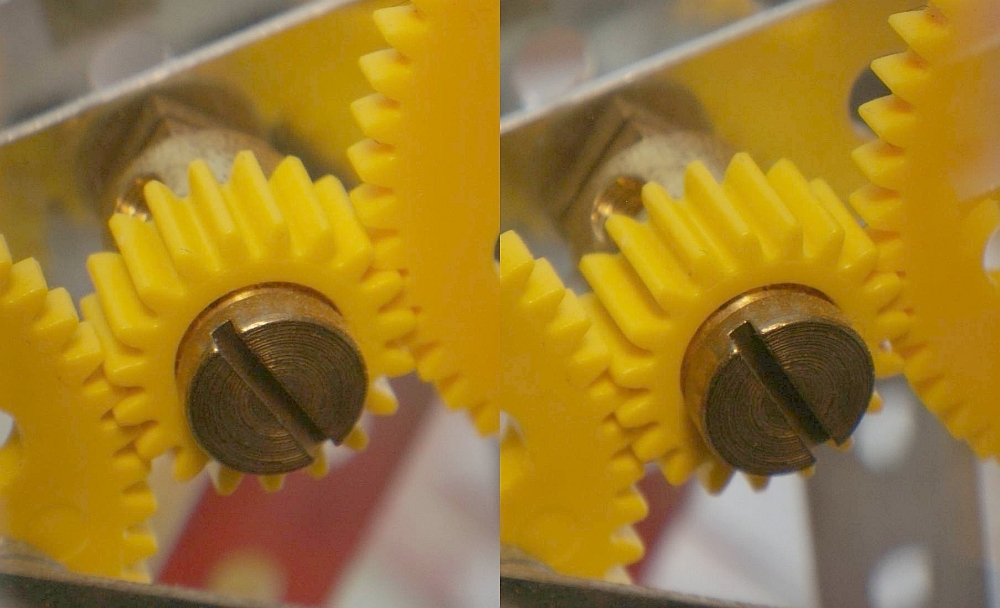
This picture was taken with the 5 diopter supplementary lens at about 5 inches from the subject. This use of close-up lenses in front of two stereo apertures causes stereo axis convergence and some skew distortion. It is small enough that it's not distracting in the tests I've done. It is best to be careful about backgrounds when shooting pictures with axial convergence, for a distant background (if detailed) will appear more distant than infinity and will be impossible for the eyes to converge upon. Keep the background just behind your subject, or use a plain, featureless background.
Clearly this macro lens could be useful for photographing subjects such as insects, bees, spiders wasps, and small mechanisms.
The 52mm threads for accessories are in the front plastic housing of the adapter, and the instructions warn you to be careful not to damage the threads. Be sure that whatever you are attaching does not have damaged threads, and don't force any accessory if it doesn't go on easily.
Somewhere on the web someone suggested using a wideangle adapter with the Loreo device. I tried this with a 0.7 x wideangle adapter, and found that its curvature of field caused mismatched distortion in the left and right images. This is not noticeable unless there are flat surfaces and straight lines in the picture. Frankly, at first I didn't see much value of this for close-up pictures. In most situations one can simply move the camera farther away from the subject, to take in a wider angle of view. But I later revised that view. See: The Loreo Macro 3d improved.
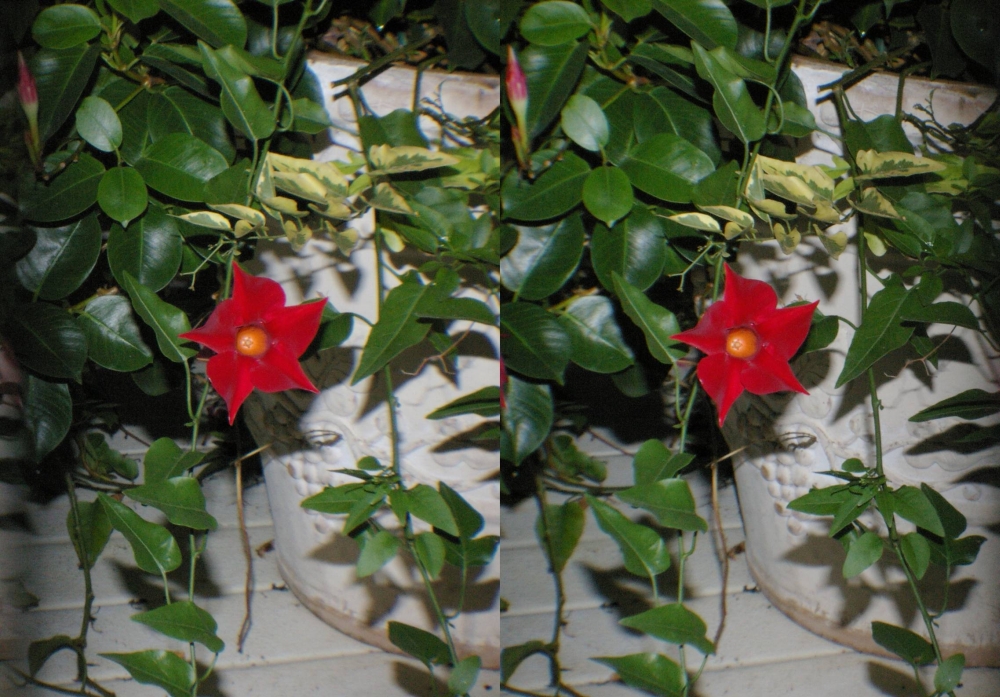
This picture and the one below were taken with the wideangle adapter. Notice that at this close distance of a few inches the depth is noticably exaggerated, and this may not be desirable for some subjects.
If you intend to use threaded accessories often, and are, perhaps, a klutz, you might consider putting a permanent metal filter ring on the adapter. This is esepcially a good idea if you intend to attach heavy accessories frequently. You can remove the glass from an old 52mm filter and use its threaded ring as a 52mm to 52mm adapter. Some filters have a retaining ring that can be unscrewed with a spanner wrench. Others will require you to smash the glass filter to remove it. Do this with a cloth over the glass. Use gloves and wear eye protection. A camera store may have old filters they will happily sell you for a few bucks. It would have been nice if the folks at Loreo had put a metal threaded ring on the device instead of threading the plastic. How much could that have increased the cost of manufacturing?
One serious drawback of any of these macro attachments for SLR cameras (mine included) is that the maximum aperture is too small for previewing composition and focus in low light conditions, such as indoors. Most SLRs do not have picture preview onscreen, but only through the lens via the flip-up mirror. This does ensure that what you see is what you get—if you can see it. Most SLR lenses have a wide aperture for previewing in low light situations. The Loreo adapter has a maximum aperture of f:11, so indoors, in stores and museums with normal lighting, you can't see what you are shooting. You are taking a best guess and hoping the composition and focus will be good. If it isn't, you can reshoot. But if you are capturing action, shooting people or animals, you may not have the opportunity. Even outdoors in daylight there's a problem for me, so much so that I've given up using this for pictures of insects. Buyers should be aware of this. For framing you might consider making a wire frame viewfinder, like the old press cameras had. But there would still be the problem of focusing through the viewfinder. The only solution seems to be to engineer a lightweight rod to extend a measured distance from camera to subject (just outside the field of view), and set the lens's distance setting to match. See the De Wijs 3d site for examples of this method.
Reviewers of previous Loreo products have sometimes complained that the pictures were not sufficiently sharp. They are probably not as sharp as a $300 2d professional lens, but I find the pictures to be quite acceptable with the camera set at 6 megapixel resolution. No one is likely to blow these up to mural size prints. Still, a disturbing defect is that the two pictures are sometimes not equally sharp. Here's a portion of a picture shown here without reduction in pixel size. The camera was set at 6 megapixel.
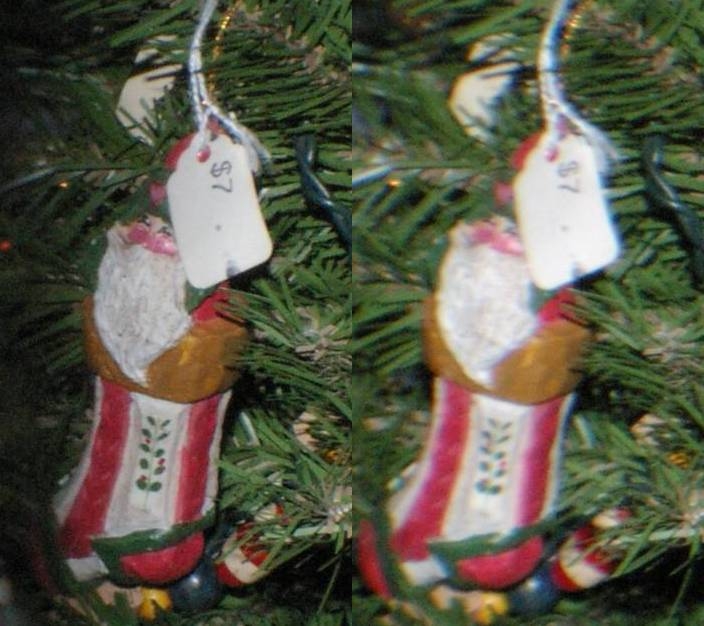
This Christmas tree had ornaments with price tags. The price tag in the left eye picture is noticably less legible than the one for the right eye. Here the difference stands out clearly. In other photos it is less noticable, but definitely present. Also note the chromatic aberration in the left eye picture, at the edge of the white tag. Since these adapters form the right and left eye images through the same lens, it cannot be a fault of the lens, but a fault of one or more of the mirrors. Yes, the front windows of the adapter were clean. I suspect that one mirror was picking up glare from a bright object outside of the field of view.
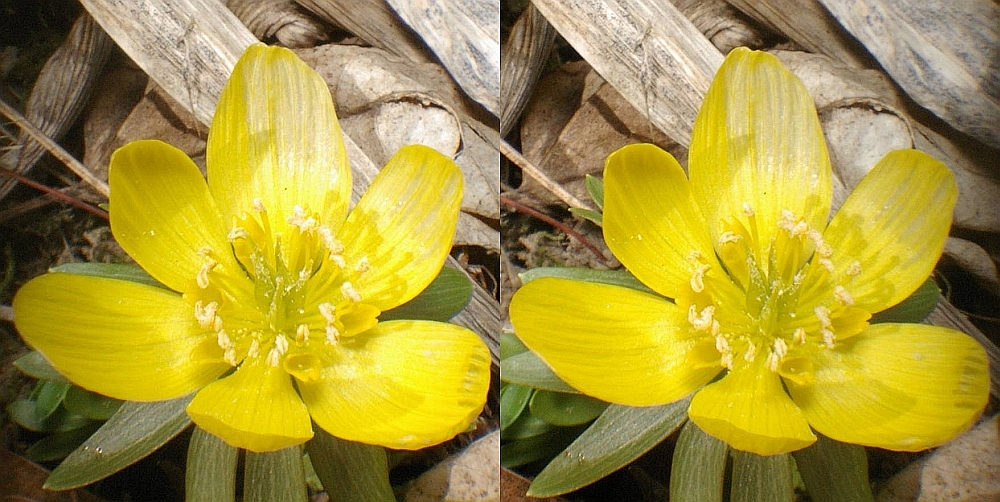
I've told you the faults of the Loreo macro. But here's a relatively fault-free picture taken with flash in a garden shop. The center black line was cropped, but a shadow of it remains at the left of the right-eye picture.
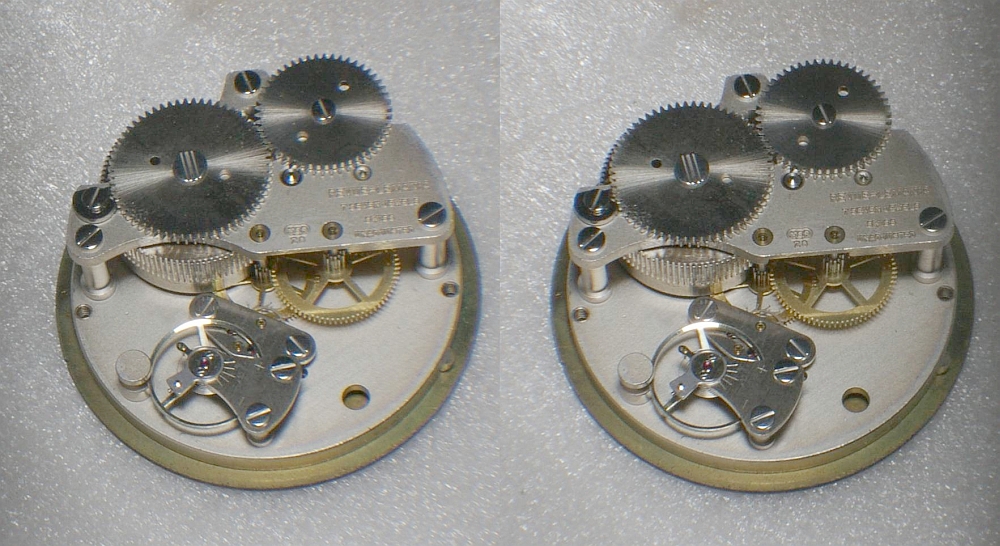
A small clock mechanism (about 2 inches diameter), taken with diffused flash at a distance of 12 inches.
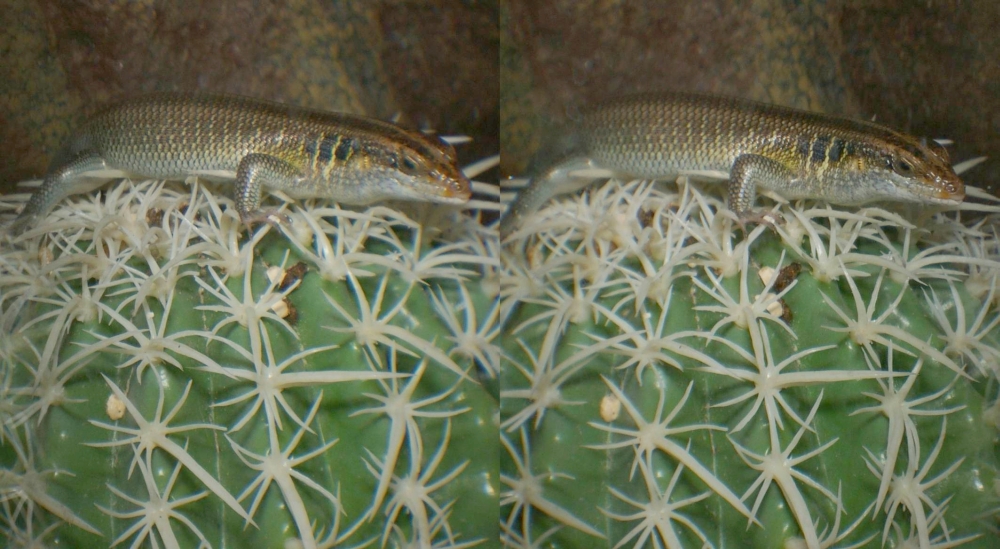
Finally, a picture from the Calico Creek pet store. It's a rainbow skink on a (fake) prickly cactus.
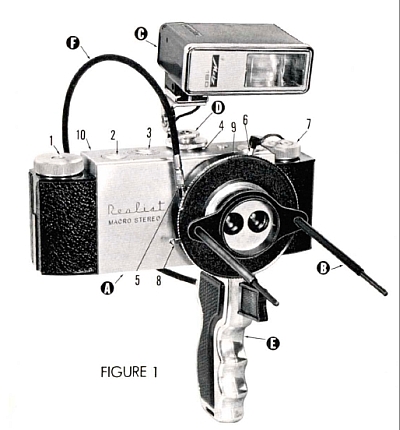 |
| The Realist Macro Stereo camera. |
|---|
In summary, this is a neat, small, lightweight and inexpensive device to carry in your camera bag to capture those uniquely stereo photo opportunities. The resolution won't be the equal of your expensive glass lenses, but is certainly adequate for use on a web page, and for making stereo viewcards to share with others. Like all macro adapters, it isn't easy to use in low light situations. But outdoors you can have a lot of fun with it. With floodlights in an indoor "studio" it can make nice stereo pictures of small models, tabletop settings, mineral specimens, and small mechanisms.
I remember the Realist Macro Stereo camera which was briefly available in the 1970s, marketed mainly to schools, for scientific photography of small specimens. It had a press camera shutter on a modified Realist Stereo camera body. It's lenses were fixed focus, at a distance of 4" to 5.5", and photographed an area of only about 2" square. This camera was rather costly at the time. Not many were produced, and they fetch even higher prices today. But I can't help thinking of the Loreo Macro attachment on a digital SLR as being a functional equivalent to the Realist Macro. Notice that the Realist Macro camera had two rods (B) extending to the subject to aid in framing and focusing, just as do the De Wijs custom macro stereo cameras, surely inspired by the Realist Macro.
I've mentioned the clarity and resolution difference between right and left pictures, and the vertical misalignment of the Loreo macro adapter. Were these just flukes of the one that I bought, or are these faults common for this product? Could it be that some people are lucky enough to get one that doesn't have these small faults? If you own one, send me an email with your observations.

All pictures on this page not otherwise credited are © 2008 by Donald E. Simanek.
Stereos for cross-eyed viewing in 3d Gallery One.
Still more, mostly taken with a digital camera in 3d Gallery Two.
Stereo view cards in 3d Gallery Three.
Home-built close-up stereo camera, 3d Gallery Four.
Review of the Loreo stereo attachment 3d Gallery Five.
The Loreo stereo attachment—improved 3d Gallery Five C.
The Loreo LIAC attachment as a 3d macro device, 3d Gallery Five D.
Wildlife photography in your backyard, 3d Gallery Six.
A home-built digital stereo camera using mirrors 3d Gallery Seven.
Stereo close-up photography in your garden 3d Gallery Eight.
Stereo photography in your aquarium 3d Gallery Nine.
Stereo digital infrared photography 3d Gallery Ten.
Wider angle stereo with the Loreo LIAC 3d Gallery ll. A failed experiment.
Review of the Fuji FinePix Real 3D W1 camera 3d Gallery 12.
Macrophotography with the Fuji 3D camera. 3d Gallery13.
Panoramic stereo photography. 3d Gallery 14.
Tips for stereo photography with the Fuji 3d camera. 3d Gallery 15.
Mirror methods for stereo photography. 3d gallery 16.
The Fuji 3d macro adapter with flash! 3d gallery 17.
Critters in stereo. 3d gallery 18
Wide angle stereo. 3d gallery 19.
Telephoto Stereo. 3d gallery 20.
2D to 3d Conversion. 3d gallery 21.
Stereos from outer space. 3d gallery 22.
Review of the Panasonic Lumix 3d digital camera. 3d gallery 23.
Reverberant flash for shadowless lighting.
Digital stereo photography tricks and effects.
Shifty methods for taking stereo pictures.
Guidelines for Stereo Composition.
![]()
Input and suggestions are welcome at the address shown to the right.
Return to the the 3d and illusions page.
Return to Donald Simanek's front page.
—Donald E. Simanek